Roofing Estimator: How a Roof Estimate Is Built in 6 Steps
Oleh Onysko 18 October 2026 12 min read
In this article
A roofing estimator turns a roof into a scope you can price: measured squares of roof area, a pitch factor, a stated waste rate, and a line for every edge, layer and penetration. Whether the estimator is a person on your crew or an app, the job is the same: measure what is there, write down what you cannot see yet, and hand over numbers someone else can check.
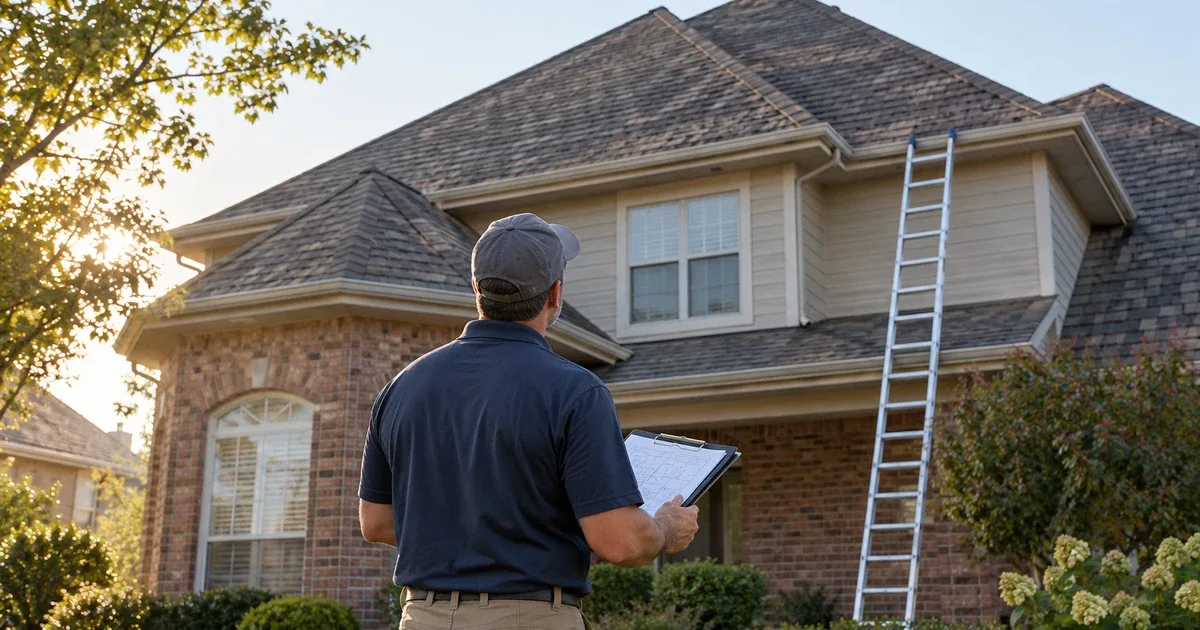
Here is the part most guides skip. Measuring the roof is the easy part, and aerial reports and plan takeoffs do it well. Bids are won or lost on what nobody can see from the ground or a satellite: how many layers are on, whether the decking is sound, and what the flashing looks like at the chimney and walls. A good roofing estimate keeps measured quantities and stated allowances on separate lines, so a surprise at tear off becomes a priced change instead of a loss.
| Roofing estimate fact | What it means |
|---|---|
| One square | 100 sq ft of roof surface |
| Pitch factor | Square root of (144 + rise squared), divided by 12 |
| 7 in 12 factor | 1.1577 |
| Typical waste | Lower on a simple gable, higher on a cut up hip |
| Hidden conditions | Layers, decking, flashing: inspect or allow for them |
| Worked example | 48 x 32 ft hip house, 24 order squares |
What a roofing estimator does
A roofing estimator, sometimes called a roof estimator, has four jobs on every residential bid:
- Inspect the roof: layers, soft spots, flashing, vents, gutters and access for the crew and the dumpster.
- Measure the planes, the edges (eaves, rakes, hips, valleys, ridges, wall lines) and count the penetrations.
- Convert measurements into an order and a labor scope: squares with pitch and waste, linear feet of edge metal and ridge cap, counts of boots and vents.
- Write the scope: what is included, what is an allowance, and what is excluded.
On a small crew the owner usually does all four between jobs. On a larger one, a dedicated estimator runs the inspection and measurement, and the price sheet comes from the office. Either way, the material math is the same. If you want the software side of the same job, our guide to roofing estimating software covers what a tool should show you at each step.
How to estimate the size of a roof
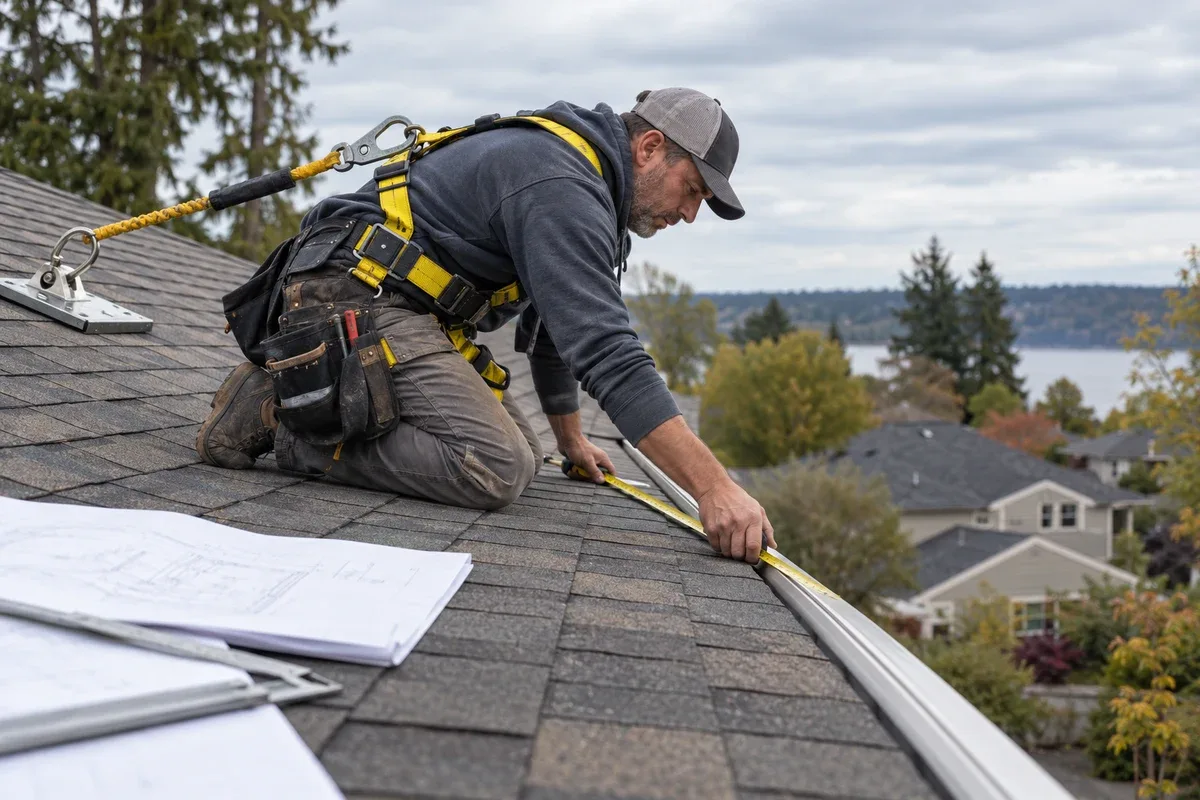
Start with the footprint, add the overhangs, then multiply by the pitch factor. The footprint comes from the floor plan, a site plan of the lot, or a tape around the house. Plan area is what you see from above. Roof area is larger because the roof is tilted.
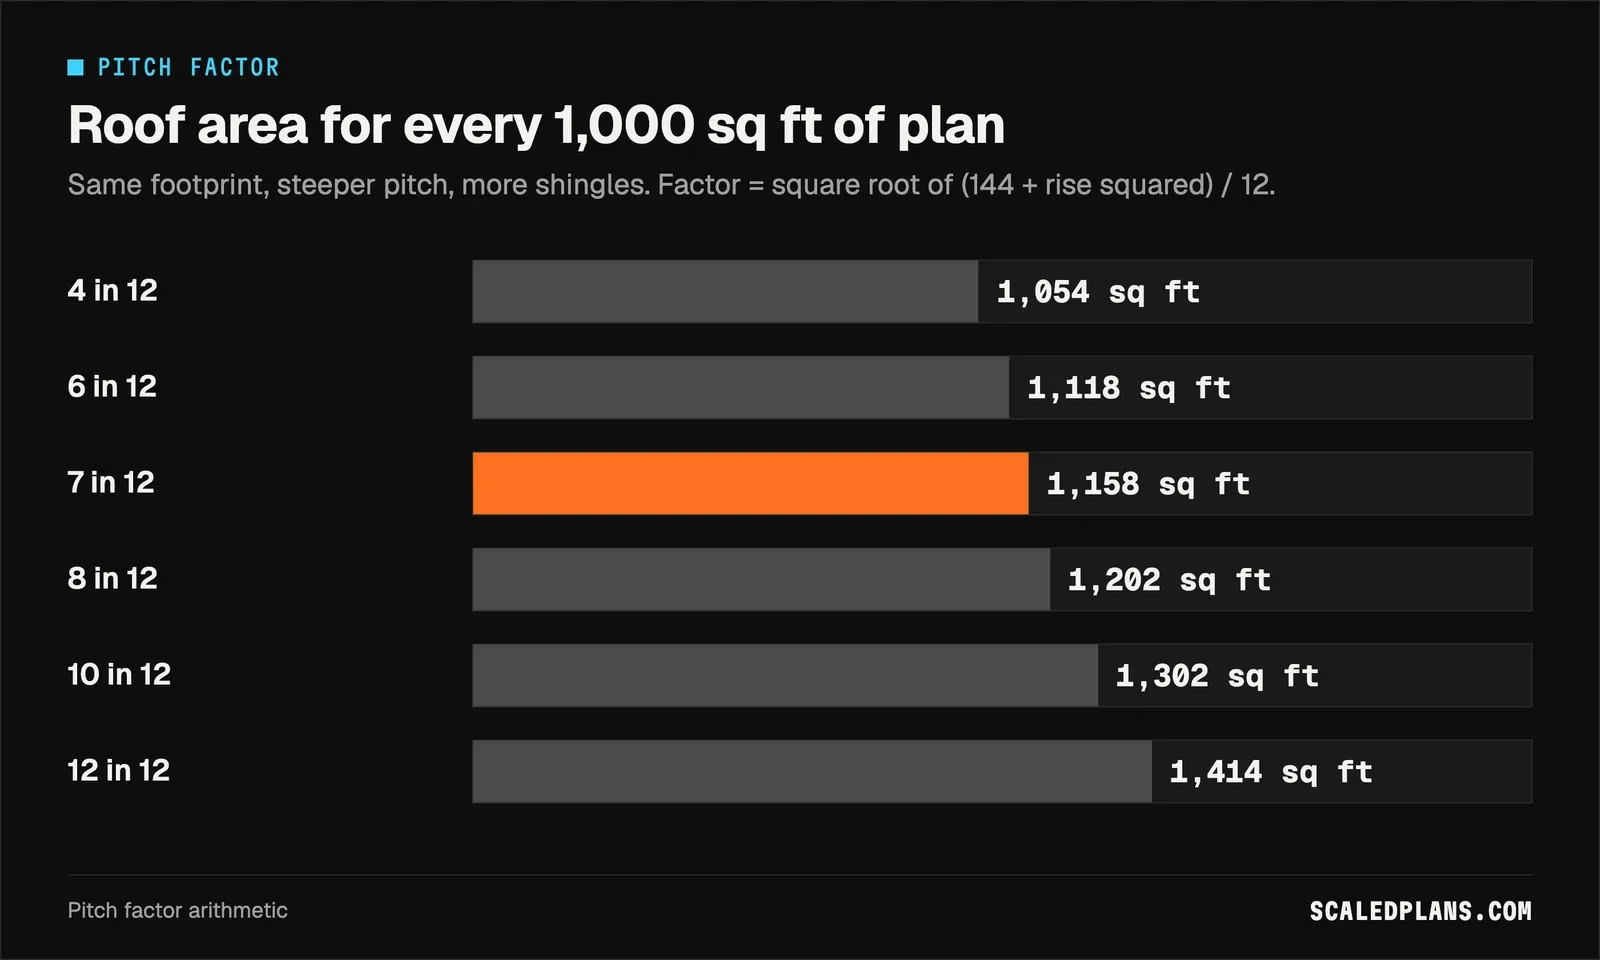
The pitch factor is the square root of (144 plus the rise squared), divided by 12. At 7 in 12 that is the square root of 193, or 13.892, divided by 12, which gives 1.1577. Every 1,000 sq ft of plan becomes 1,158 sq ft of roof.
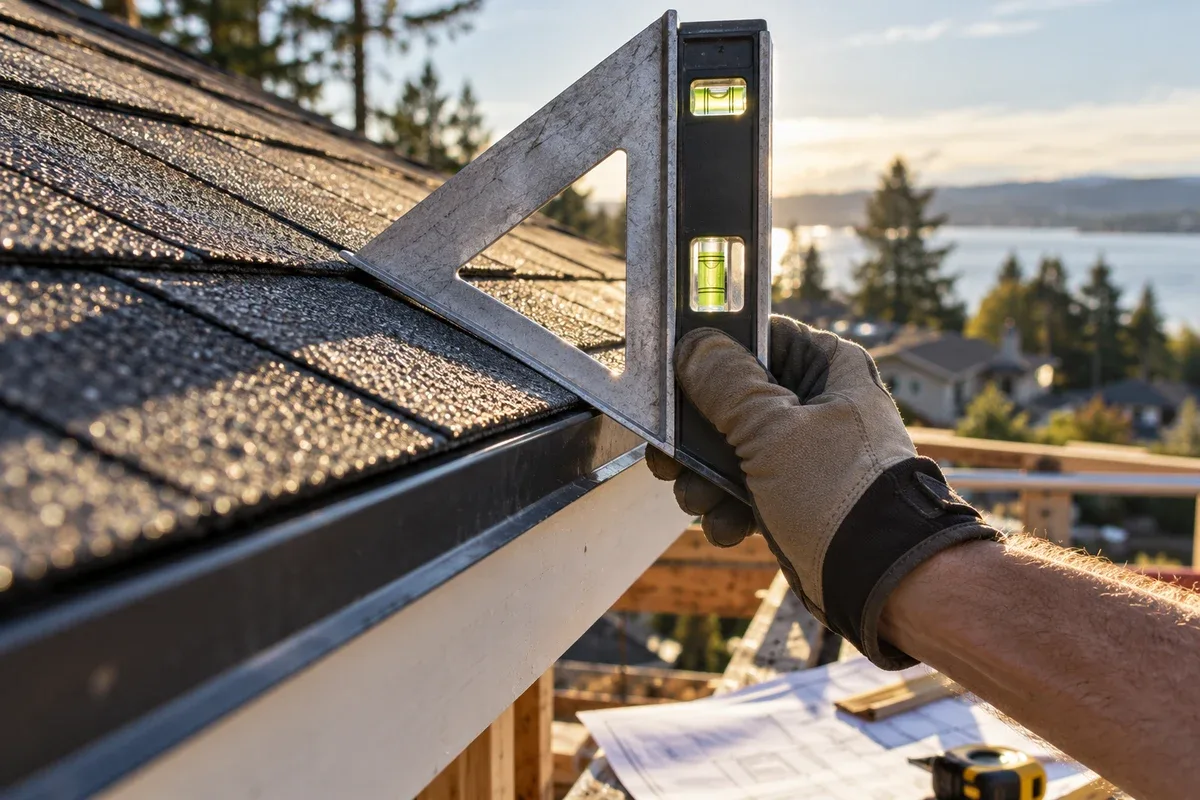
Read pitch from the elevations on new work, or measure it on site with a level and a speed square: hold the level flat, measure 12 inches out, and read the rise to the roof surface. Record the pitch for each plane with its source. Mixed pitches, like a 7 in 12 main roof with a 3 in 12 porch, get measured and factored as separate planes. If you take dimensions off a drawing set, the blueprint reader guide explains scales and sheet references.
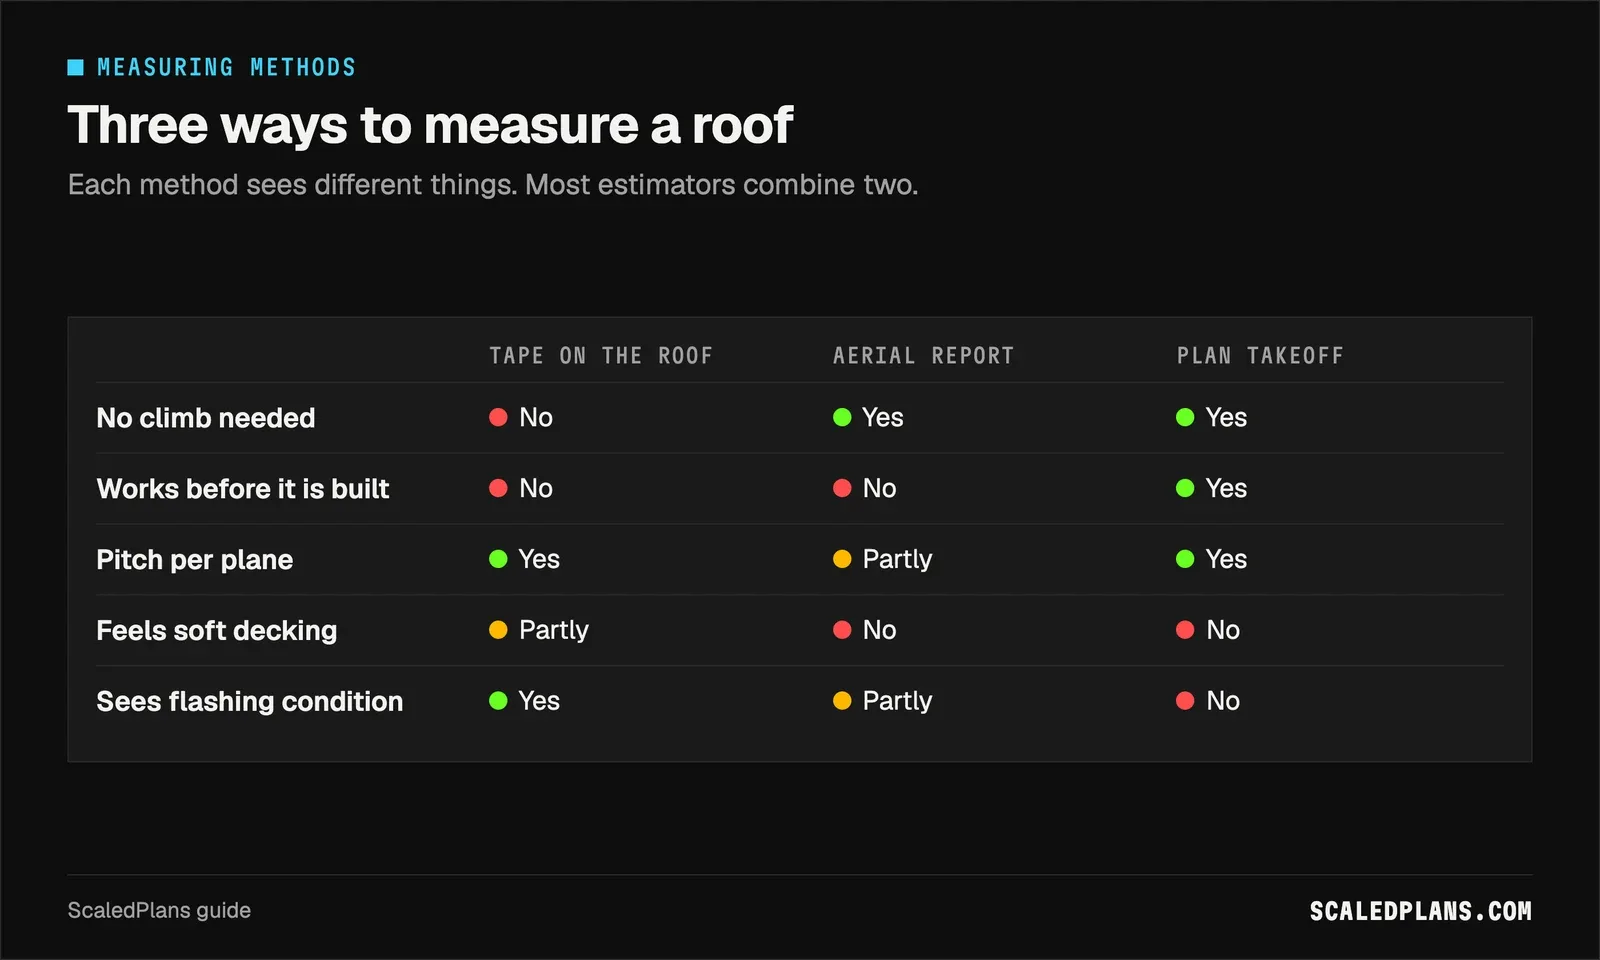
Three ways to measure
| Method | Best for | Watch out for |
|---|---|---|
| Tape on the roof | Reroofs you can walk safely | Fall protection, time on steep roofs |
| Aerial measurement report | Steep, tall or cut up roofs | Trees and shadows hide edges; nothing about decking |
| Plan takeoff | New construction and additions | Plans may differ from what was built |
Most estimators combine two: an aerial report or plan takeoff for the geometry, plus a walk of the roof (or at least the attic) for conditions. Automated measurement is improving fast, and our AI takeoff software guide covers what it can and cannot read from a plan.
Worked example: a 24 square hip roof
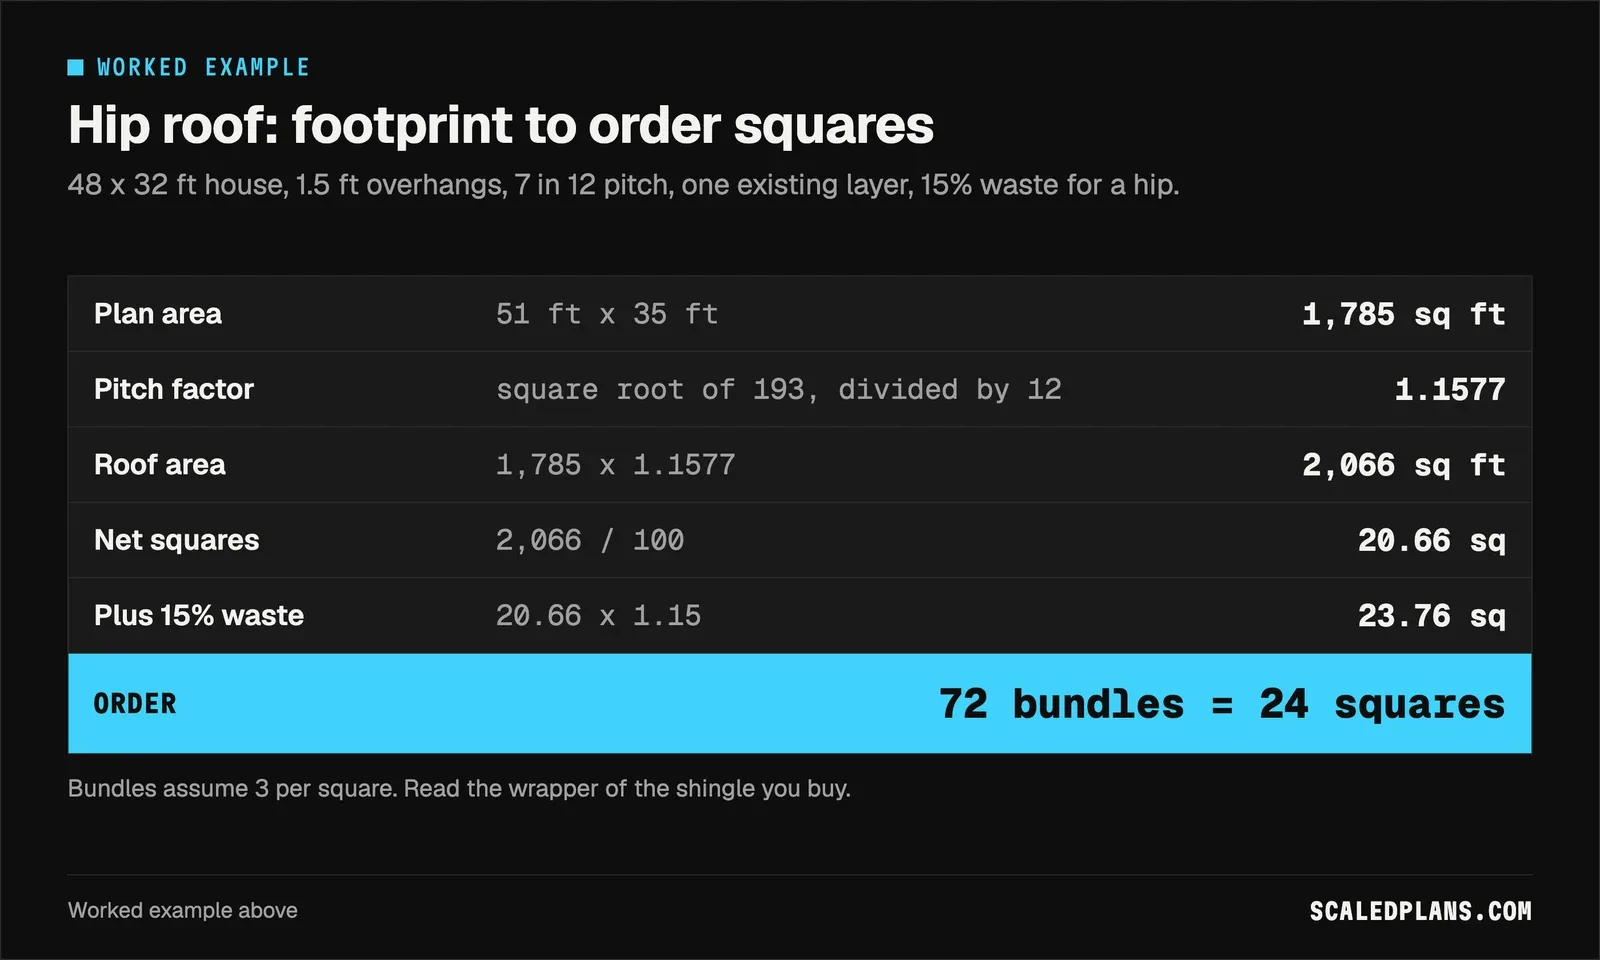
The fictional house is 48 x 32 ft with 1.5 ft overhangs on every side, a 7 in 12 hip roof and one existing layer of asphalt shingles. A hip roof has no rakes, so every edge at the bottom is an eave.
| Line | Basis | Quantity |
|---|---|---|
| Plan area | 51 x 35 ft | 1,785 sq ft |
| Roof area | 1,785 x 1.1577 | 2,066 sq ft (20.66 squares) |
| Order squares | 20.66 x 1.15, rounded up to whole bundles | 72 bundles (24 squares) |
| Eaves (starter, drip edge) | 2 x (51 + 35) | 172 LF |
| Hips | 4 x 17.5 ft run x 1.5298 hip factor | 107.1 LF |
| Ridge | 51 minus 35 | 16 LF |
| Ridge cap | 107.1 + 16 | 123.1 LF |
| Tear off | 1 layer over net area | 20.66 squares |
The hip factor at 7 in 12 is the square root of (288 + 49), divided by 12, which is 1.5298. Each hip covers half the building width (17.5 ft) in plan. The 15% waste rate fits a hip roof because every course gets cut at the hips; a plain gable of the same size would usually run lower. Three bundles per square is common for laminated shingles, but read the wrapper of the product you order.
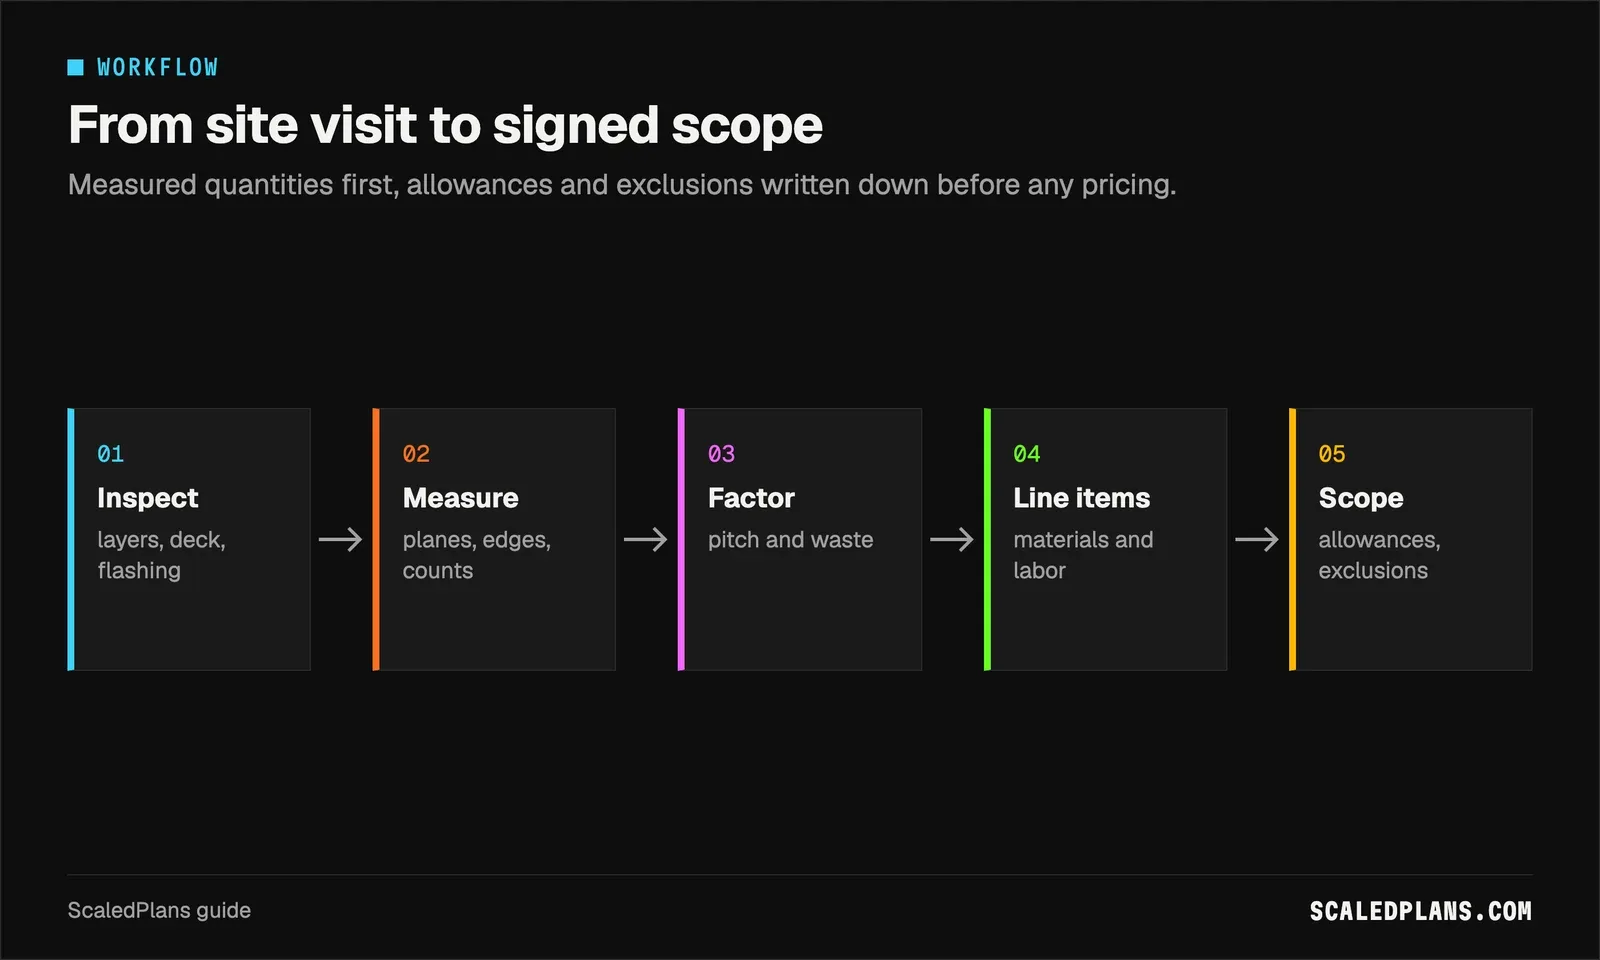
How to estimate a roofing job
- Inspect before you measure
Count the layers at an edge or a vent, walk the deck for soft spots, check the attic for stains, and look closely at flashing at walls, chimneys and valleys.
- Measure planes, edges and counts
Record each plane with its dimensions and pitch, then the eaves, rakes, hips, valleys, ridges and wall lines, then every pipe, vent and skylight.
- Apply pitch and waste
Multiply plan area by the pitch factor, divide by 100 for squares, then add a waste rate you tie to the roof shape.
- Build the line items
Turn squares into shingles, underlayment and tear off, linear feet into starter, drip edge and ridge cap, and counts into boots and vents.
- Write allowances and exclusions
Price decking as a per sheet allowance, name anything you could not inspect, and list what the bid does not include.
- Check the code items
Confirm underlayment, ice barrier and reroof rules with your permit office before you send the number.
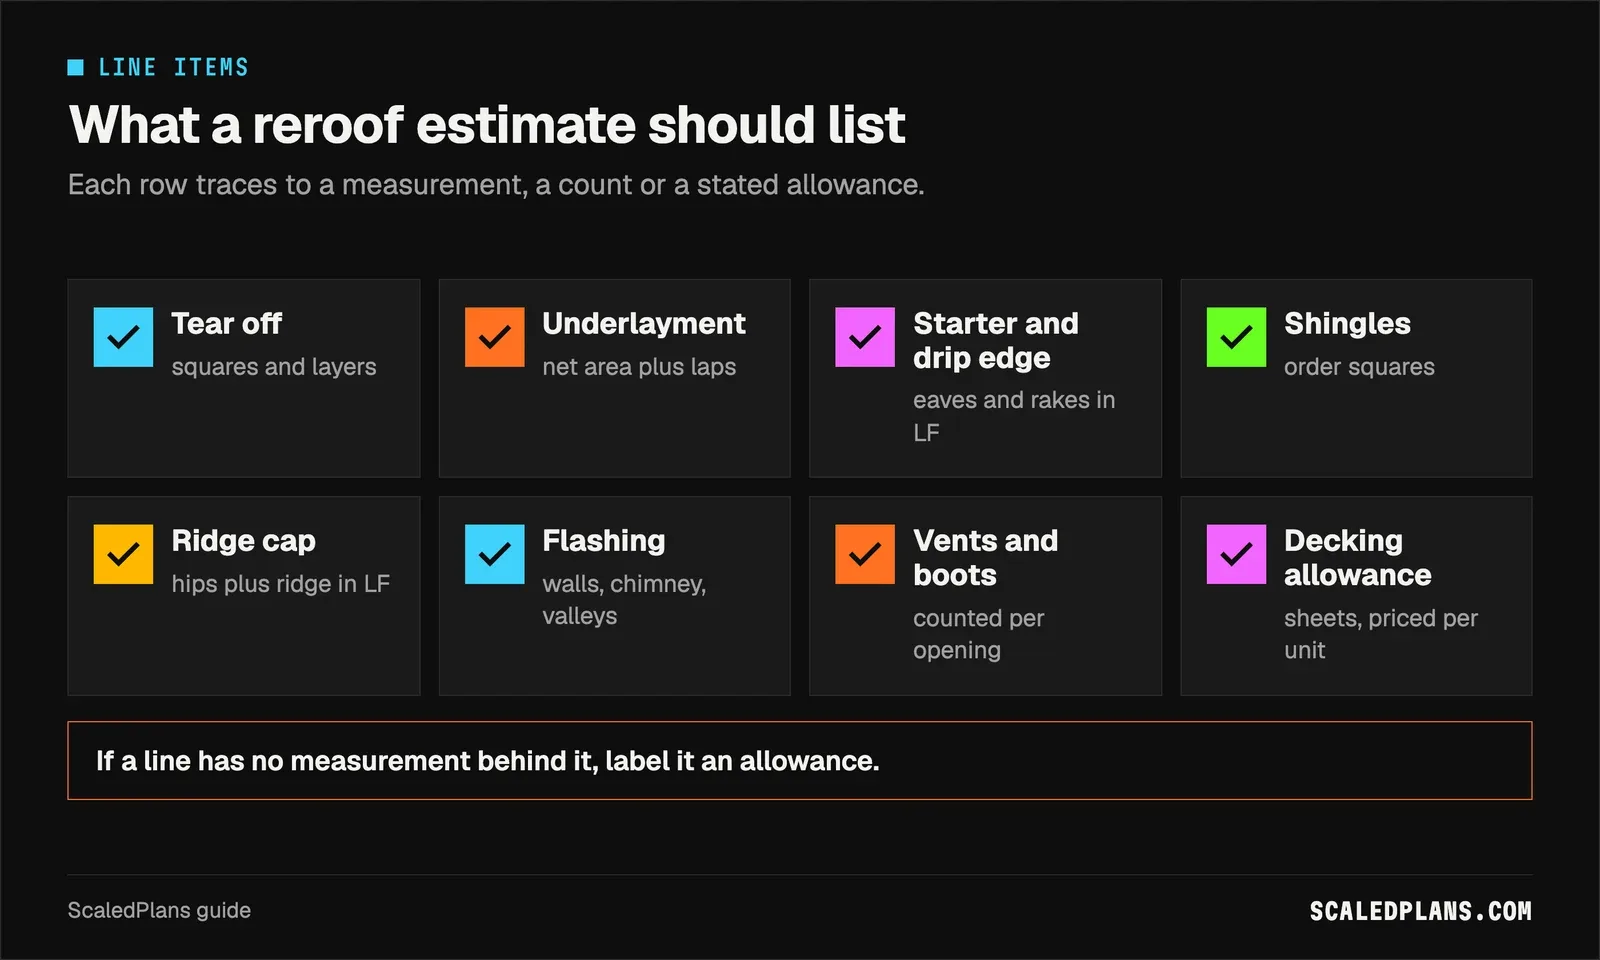
Roofing estimate line items
A roofing estimate should read like a list of facts, each with its basis. Squares drive shingles, underlayment and tear off. Edges drive starter, drip edge, ridge cap and valley material. Counts drive pipe boots, vents and skylight kits. Conditions add whole lines: a second layer doubles the tear off, a low slope plane changes the underlayment, rotted decking adds sheathing.
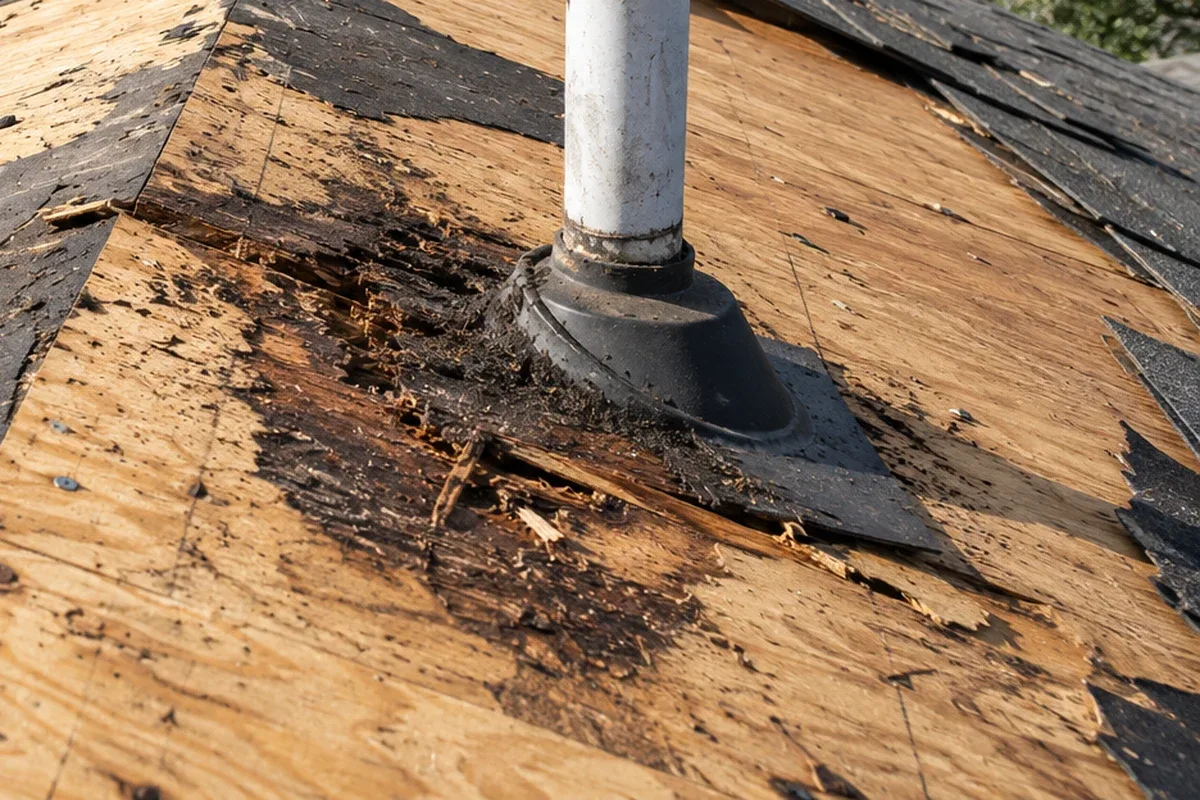
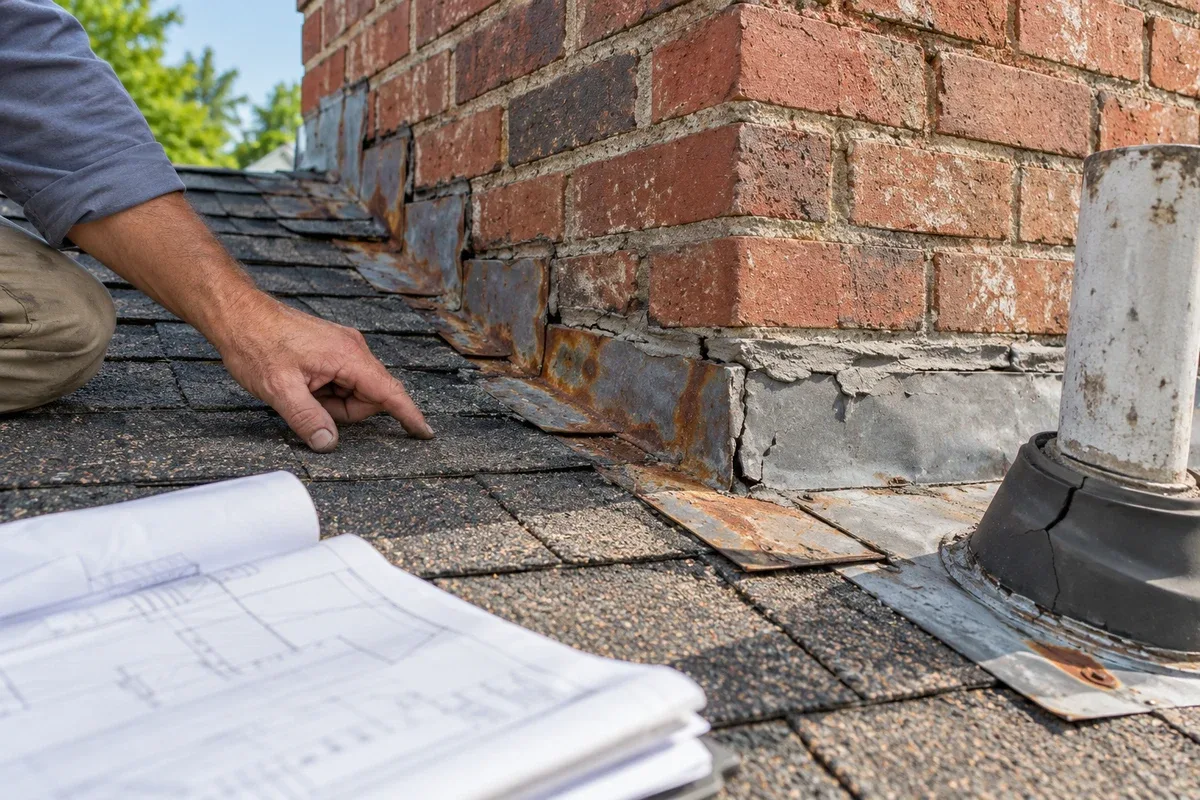
Decking is the line that sinks bids. You rarely see the full deck until the shingles are off, so price replacement as a unit allowance (per sheet) and say how many sheets the base bid includes. The photo below is the reason: from the ground this roof looked fine.
Flashing is the second. Old step flashing at a wall or chimney may be reusable or may be rusted through. Write which one you are pricing. If replacing the deck also means rebuilding a rotted fascia or rafter tail, that is framing work; the lumber takeoff guide shows how to list it.
Which estimate fits your job
The right method depends on the job in front of you. Use this as a quick verdict.
| Situation | What to do |
|---|---|
| Simple reroof, one layer, walkable | Tape and pitch on the roof; check the attic |
| Steep, tall or cut up roof | Aerial report for geometry, walk the edges you can reach |
| Two or more existing layers | Price tear off per layer; confirm the reroof rules locally |
| Storm or insurance work | Document damage per plane with photos before measuring |
| New construction or addition | Plan takeoff from the roof plan and elevations |
| Partial repair | Check local rules on how much roof you may repair |
Estimating a roof by hand, and where it breaks down
You can do every step above with a tape, a level, a notepad and a calculator. Sketch the roof from above, number the planes, write each plane's dimensions and pitch, total the squares, then list the edges and counts. It works, and you should do it at least once so you know what any tool is doing.
It breaks down in three places. Revisions mean re-measuring and re-adding everything. A cut up roof with dormers and valleys is easy to miss a plane on. And six weeks later, when the homeowner asks why the order was 24 squares, the notepad rarely says which number came from where.
If the same job includes new siding or gable wall cladding, it is sold by the same 100 sq ft square, so measure the walls now:
ScaledPlans measures the plan or photos and lists every quantity with its source, and you check each one before you price it. Get started with your next roof, or browse the other free contractor calculators.
Common roofing estimate mistakes
- Pricing plan area as roof area. Multiply by the pitch factor for every plane.
- One waste rate for every roof. Tie it to the shape: more cuts, more waste.
- No decking line. Price replacement per sheet and state how many are included.
- Guessing the layers. Check at an edge or vent; each layer is more tear off and disposal.
- Skipping the code check. Shingle installation follows chapter 9 of the International Residential Code as adopted locally, and underlayment, ice barrier and reroof rules vary, so check with your permit office.
What is the 25% rule for roofing?
The 25% rule is a Florida Building Code requirement: no more than 25 percent of a roof or roof section may be repaired, replaced or recovered in any 12 month period unless the whole roof or section is brought up to current code. The Florida Roofing and Sheet Metal Contractors Association explains how the rule is applied. Other states and insurers use similar thresholds, so on any partial repair, check with your permit office before you scope it.
A roofing estimator measures squares, applies a pitch factor and a stated waste rate, and lists every edge, layer and penetration. The habit that protects your margin is simple: anything you could not see goes on its own allowance line. Run the numbers by hand once, then let a tool do the measuring while you check it.
Frequently asked questions
A roofing estimator inspects a roof, measures its planes, edges and penetrations, and turns those measurements into a material order and a labor scope. They count layers, check decking and flashing, apply a pitch factor and waste rate, and write allowances for conditions they cannot see. On small crews the owner often does this; larger contractors have a dedicated estimator who hands the scope to the office for pricing.
Measure the footprint, add the overhangs on each side, and multiply the plan area by the pitch factor. The factor is the square root of 144 plus the rise squared, divided by 12. At 7 in 12 it is 1.1577, so 1,785 sq ft of plan becomes about 2,066 sq ft of roof. Divide by 100 to get squares. Measure planes with different pitches separately.
Take the roof area in square feet, divide by 100 for net squares, then add waste for the roof shape. A cut up hip roof needs more waste than a simple gable because every course is cut at the hips. Round up to whole bundles. Many laminated shingles come three bundles to a square, but check the wrapper, because some products pack differently.
It depends on your market and the job, so get local quotes on the same written scope. The main drivers are the shingle line you choose, how many layers come off, pitch and height, access for the crew and dumpster, decking replacement and flashing work. Ask each roofer to list squares, layers, decking allowance and exclusions so you can compare the bids line by line.
In Florida, the building code limits repairs, replacement or recovering to 25 percent of a roof or roof section in any 12 month period. Past that, the whole roof or section must meet current code. Some insurers and other jurisdictions use similar rules. If you are scoping a partial repair, confirm the local rule with your permit office before you write the estimate.
Class 4 shingles have the higher impact rating under UL 2218 (summarized in an IBHS study), tested with a 2 inch steel ball instead of the 1.75 inch ball used for Class 3. That makes Class 4 the stronger choice where hail is common. Some insurers treat impact rated roofs differently, so ask your insurer before choosing. On a bid, list the rating on the shingle line so homeowners compare like for like.
Put it on your next bid
Plans in. Checked quantities out.
Upload the plan you are bidding, review every quantity on the drawing and export the list. Or start with the free drywall calculator.
Share article
About the author
Founder
Oleh Onysko founded ScaledPlans and builds the product: how plans are measured, what each document includes and how every number stays checkable on the drawing.
More articles
 Takeoffs & estimating · 12 min
 Drywall Estimating Software: Check 46 Sheets by Hand
Drywall estimating software is only as good as the wall runs it records: length, height, faces, layers and board type. Work a fictional basement from runs to 46 sheets of 4x12, compare sheet sizes, then use the same checks on any tool's export.
 Takeoffs & estimating · 12 min
 Paint Estimating Software: Check 1 Room in 8 Lines
Paint estimating software earns its place when every gallon traces to a measured surface, a coat count and a spread rate from the data sheet. Work one bedroom by hand in 8 lines, then hold any app to the same rows, with prep, access and lead-safe work kept separate.
 Takeoffs & estimating · 12 min
 Lumber Takeoff: Count a Framing List in 5 Steps
A lumber takeoff lists every framing piece by size, length, count and wall. Count in a fixed order, convert to stock lengths and add one stated allowance. Worked example: a 20 x 12 ft addition needs 80 studs, 14 plate sticks and 17 sheathing panels.
 Takeoffs & estimating · 11 min
 Blueprint Reader: 5 Checks Before Any Takeoff
Read a plan sheet like an estimator: identify the revision, calibrate the scale twice, pick the right view and tie every quantity to its sheet. Worked example: one revised opening takes 1,920 sq ft of board down to a 65 sheet order.
 Takeoffs & estimating · 11 min
 AI Takeoff Software: A 5 Step Test on Your Own Plans
Before you trust AI takeoff software, run it on a plan you already counted. Score misses, extras and length drift per item, then convert each error into material. Worked example: 6 ft of wall drift leaves you 3 sheets of board short.
 Takeoffs & estimating · 13 min
 Plumbing Estimating Software: Test It on 1 Bathroom
A plumbing estimate is counting and measuring: fixtures, connections, supply and DWV runs, fittings. Work a two bathroom rough-in by hand, then hold any software to the same rows: fixture tags, hot and cold apart, vertical runs, sticks and coils, and a written scope boundary.