Plumbing Estimating Software: Test It on 1 Bathroom
Oleh Onysko 16 October 2026 13 min read
In this article
Plumbing estimating software should start from the fixture schedule and end with a pipe and fitting list you can defend line by line. Test it on one bathroom you already took off by hand: if every row traces to a fixture, a sheet and a measured length, keep it; if the total only matches by accident, it fails.
The pipe is rarely where a plumbing bid goes wrong. The fixture count is. Every supply connection, drain, trap and trim assembly hangs off that count, so one lavatory missed on the plan, or one future rough-in priced as a full fixture, moves a dozen rows at once. Reconcile fixtures first and the pipe math becomes simple arithmetic.
| At a glance | Answer |
|---|---|
| What it counts | Fixtures, connections, supply and DWV runs, fittings, valves |
| First input | The fixture schedule, reconciled with plan symbols |
| Supply split | Hot and cold apart, so manifold ports fall out of the list |
| DWV split | By diameter: 3 in., 2 in., 1.5 in. on separate rows |
| Phases | Rough-in and trim on separate rows from row one |
| Sizing | Taken from the drawing and adopted code, never resized to fit |
What plumbing estimating software has to count
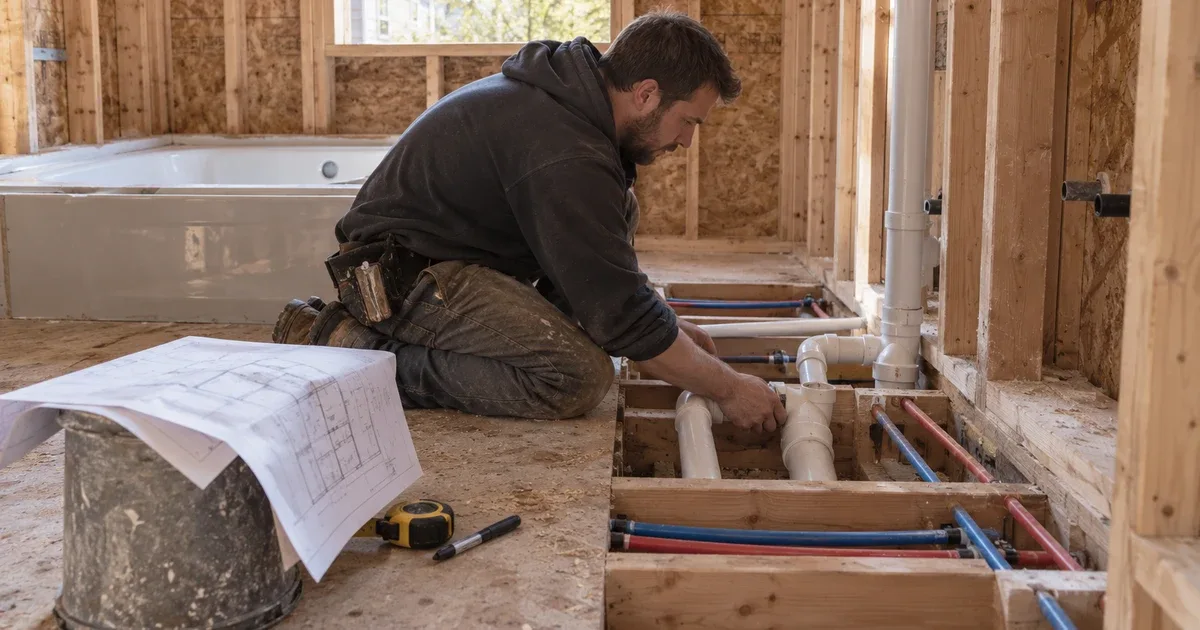
A residential plumbing bid is mostly counting and measuring. The fixture schedule is the spine. Every water closet, lavatory, tub, shower, kitchen sink, dishwasher, clothes washer, hose bibb and water heater drives three sets of quantities: supply connections, drain connections and trim.
Each fixture also implies parts the drawing never shows: stop valves, supply lines, traps, tailpieces, closet flanges and rough-in valves. Good software attaches those as a visible assembly per fixture type. A lavatory assembly that includes two stops and a P trap is fine. One that quietly includes a pop up drain the owner is supplying is a double count. Open each assembly once per job and check it against the spec.
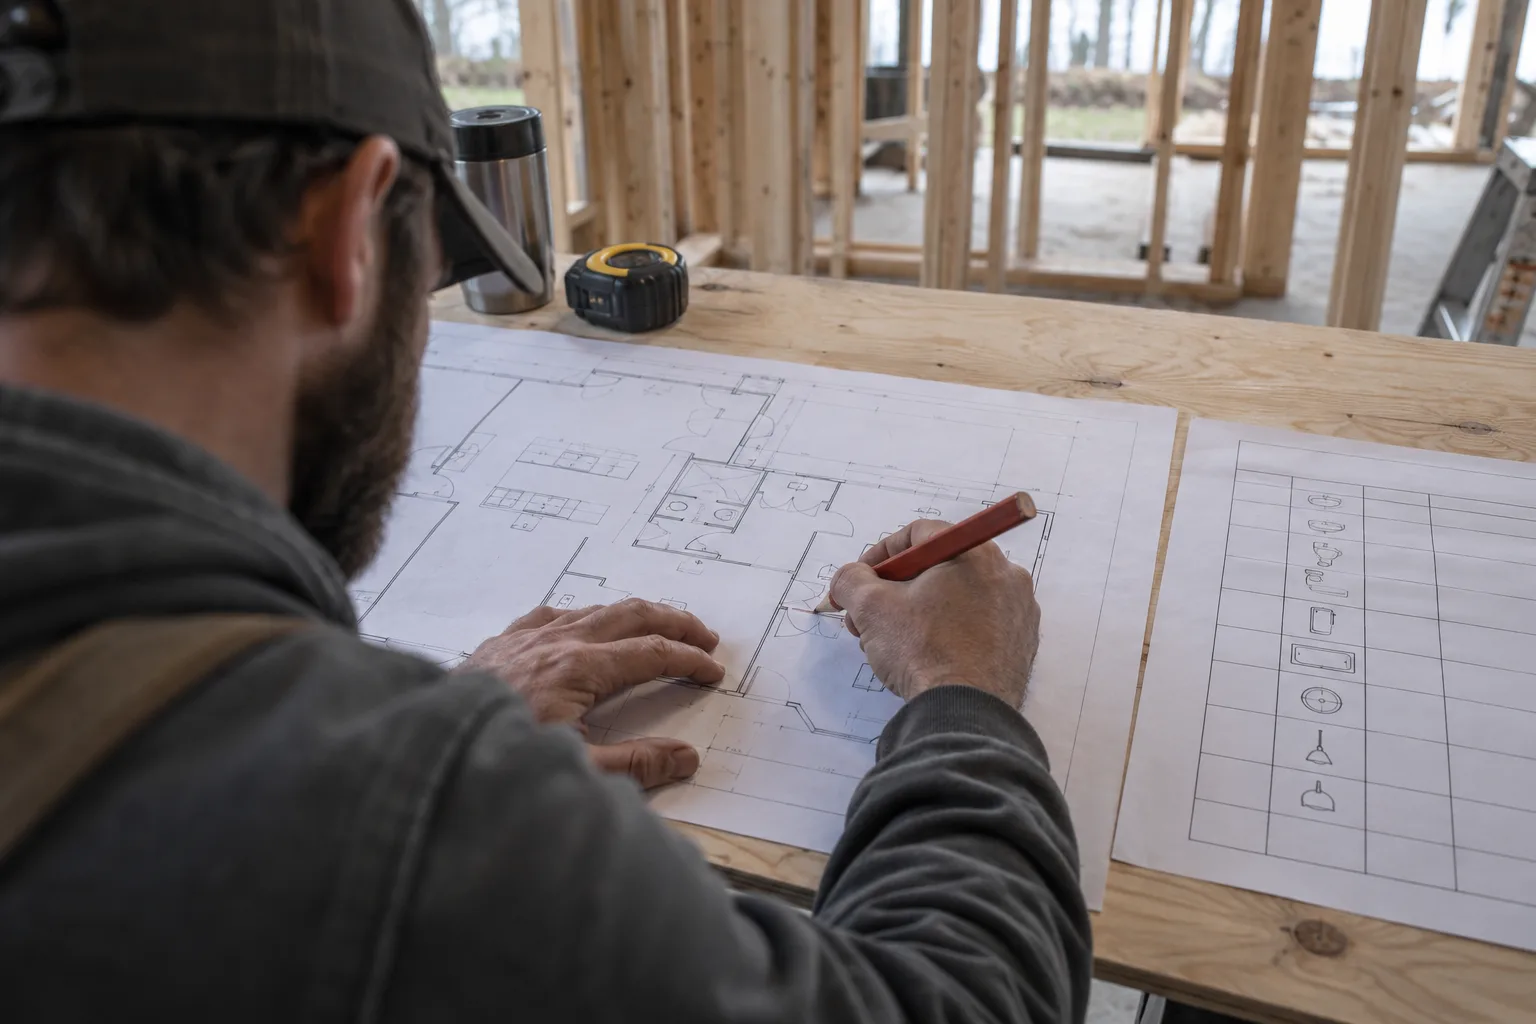
Then reconcile. Count fixtures from the schedule, count the symbols on each floor plan, and settle every difference before you measure a foot of pipe. Differences usually come from fixtures shown in an elevation but not the plan, rough-ins for future fixtures, or existing fixtures that stay. Give each one a status: new, existing to remain, relocated or future rough-in. A future rough-in has pipe and a cap but no fixture and no trim. If the schedule says three lavatories and the plan shows four, log a question against that sheet instead of guessing. Our blueprint reader guide covers scale checks and sheet references for this count.
Plumbing takeoff by system
Split the job into systems before you measure. Water supply covers the service, the main, distribution and the water heater connections. Drain, waste and vent (DWV) covers the building drain, branches, trap arms, stacks and vent terminals. Fuel gas, when the plumber carries it, gets its own rows because it has its own sizing method and its own inspection.
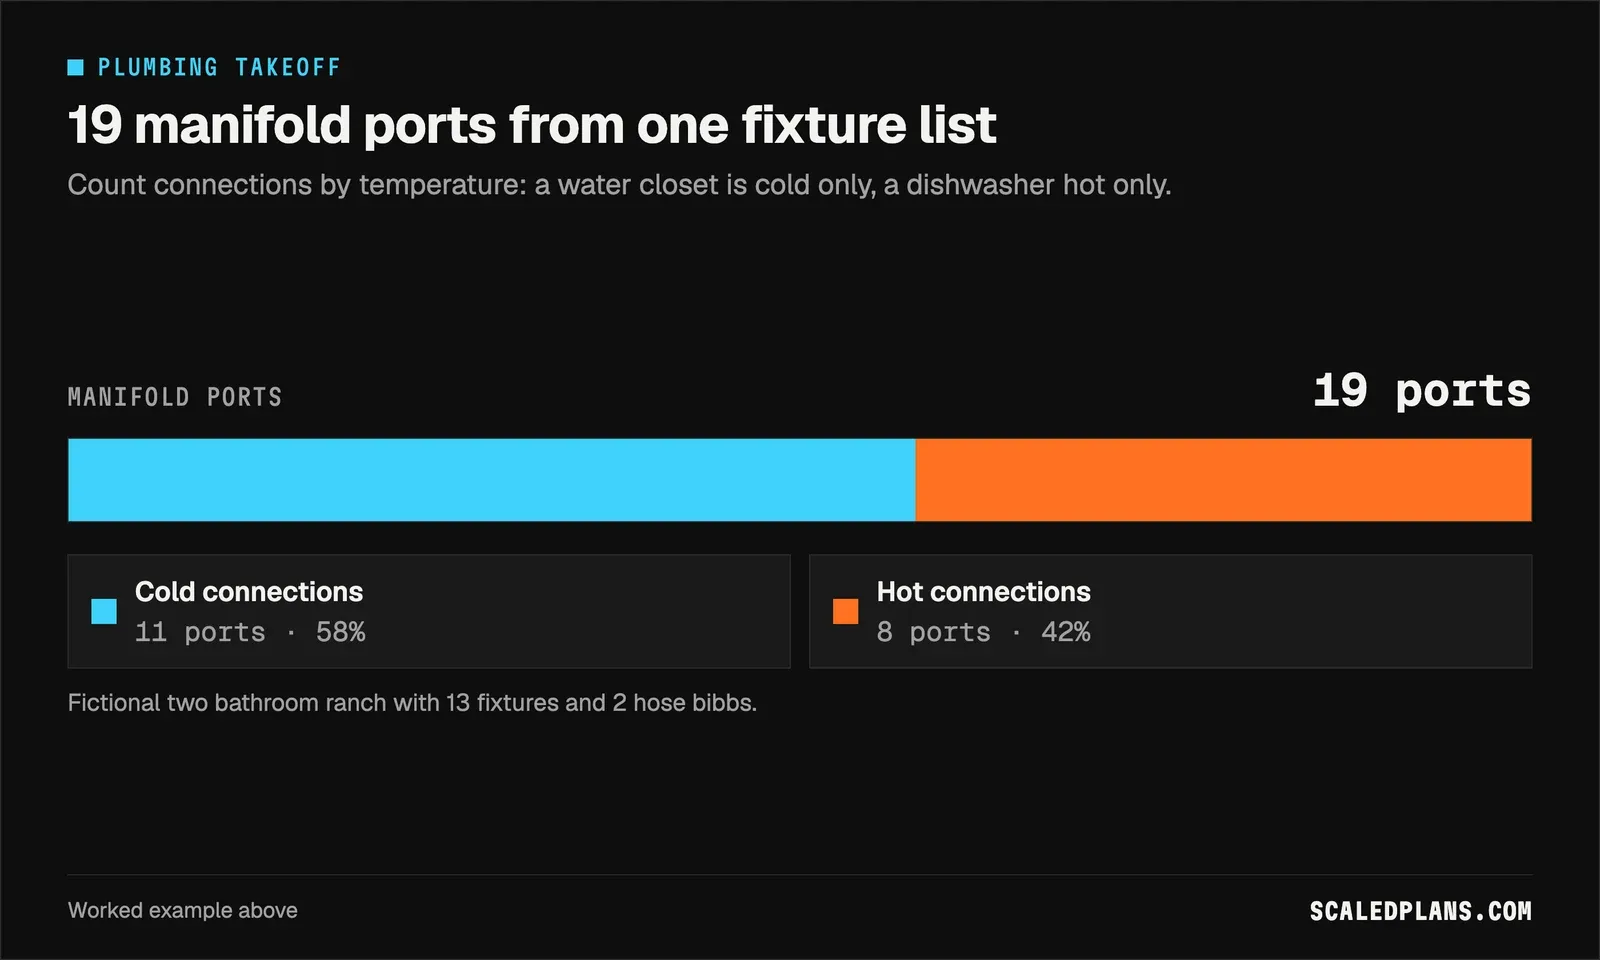
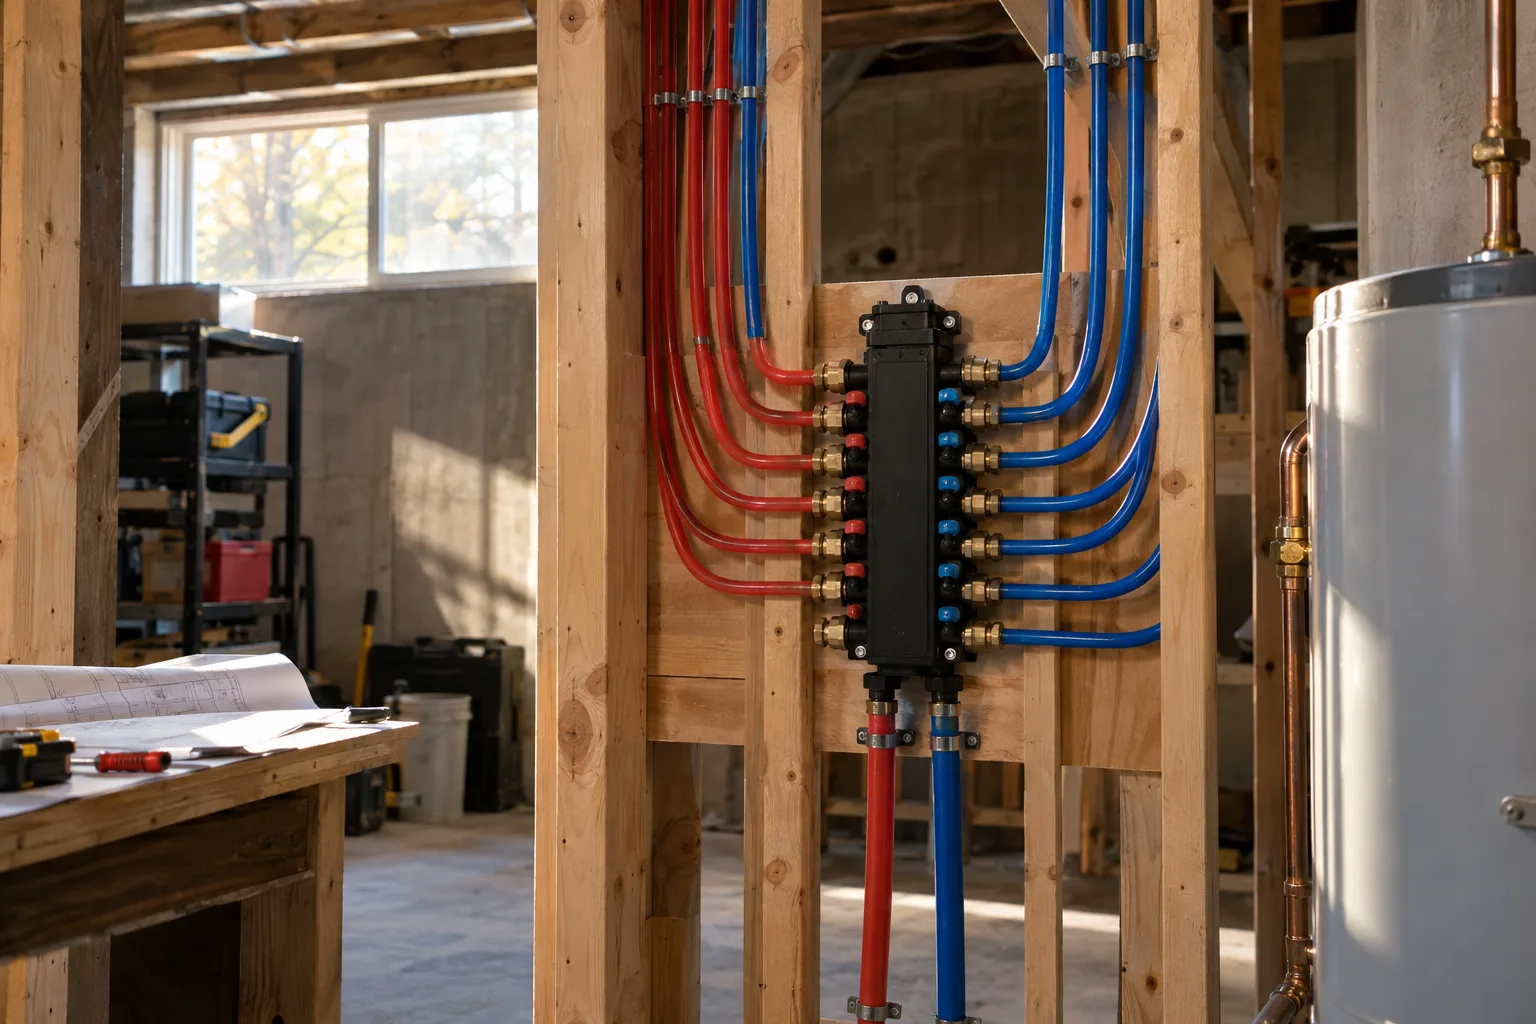
Within supply, split hot from cold. A water closet needs cold only. A dishwasher usually needs hot only. A kitchen sink needs both. Counting by temperature gives you the port count for a manifold or the tee count for a trunk and branch layout. Within DWV, split by diameter, because 3 in., 2 in. and 1.5 in. pipe are different products with different fittings.
Sizing is a code question, not a takeoff question. The IRC sets drainage fixture unit loads, pipe sizes and slope in its sanitary drainage chapter, and vent rules in the vents chapter. Many places use the UPC or local amendments instead. Record the size shown on the drawing and flag anything that looks undersized. Never resize a pipe to make a quantity work. Check with your permit office for the code edition.
Worked example: a two bathroom ranch rough-in
This ranch is fictional. It has 2 water closets, 3 lavatories, 1 tub, 1 shower, a kitchen sink, a dishwasher, a clothes washer and 2 hose bibbs.
Cold connections: 2 + 3 + 1 + 1 + 1 + 1 + 2 = 11. Hot connections: 3 lavatories + tub + shower + sink + dishwasher + washer = 8. That is 19 manifold ports.
Measured PEX home runs are 312 ft cold and 236 ft hot. A 10% allowance gives 312 × 1.10 = 343.2 ft and 236 × 1.10 = 259.6 ft. In 100 ft coils, round up to 4 and 3.
DWV measures 48 ft of 3 in., 64 ft of 2 in. and 22 ft of 1.5 in. With 10% added that is 52.8, 70.4 and 24.2 ft. In 10 ft sticks, round up to 6, 8 and 3.
| Takeoff row | Basis | Quantity |
|---|---|---|
| Cold connections | 2 WC, 3 lav, tub, shower, sink, washer, 2 bibbs | 11 |
| Hot connections | 3 lav, tub, shower, sink, DW, washer | 8 |
| PEX cold, 100 ft coils | 312 × 1.10 = 343.2 ft | 4 coils |
| PEX hot, 100 ft coils | 236 × 1.10 = 259.6 ft | 3 coils |
| DWV 3 / 2 / 1.5 in., 10 ft sticks | 52.8 / 70.4 / 24.2 ft | 6 / 8 / 3 sticks |
| Building drain fall | 48 ft × 1/8 in. per ft | 6 in. |
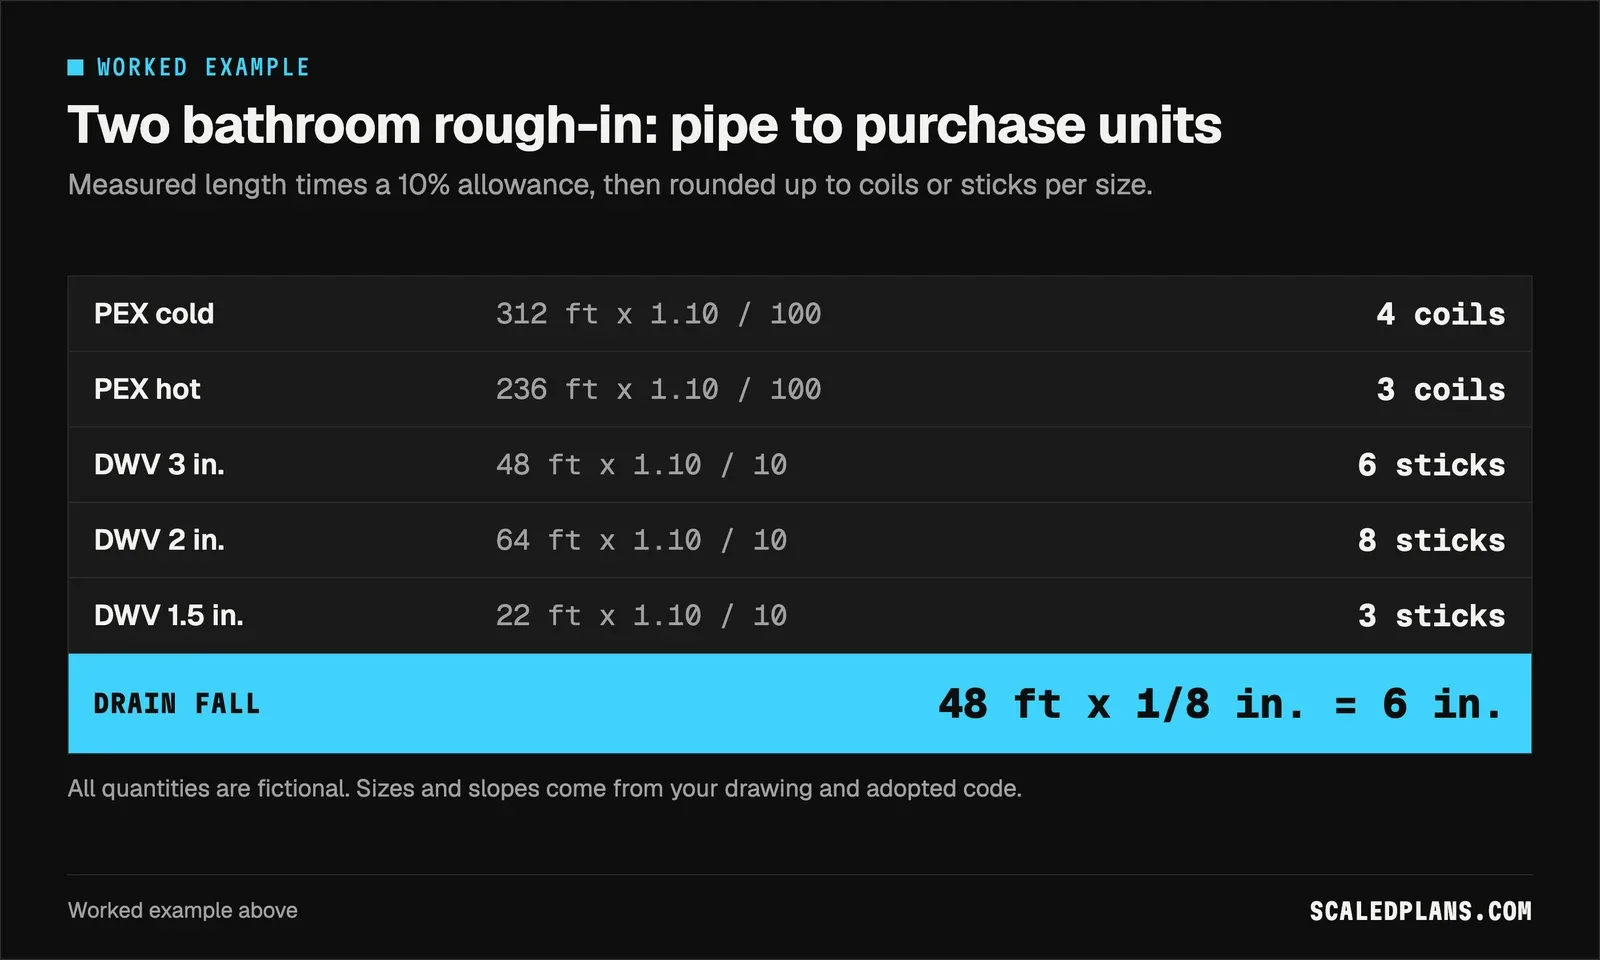
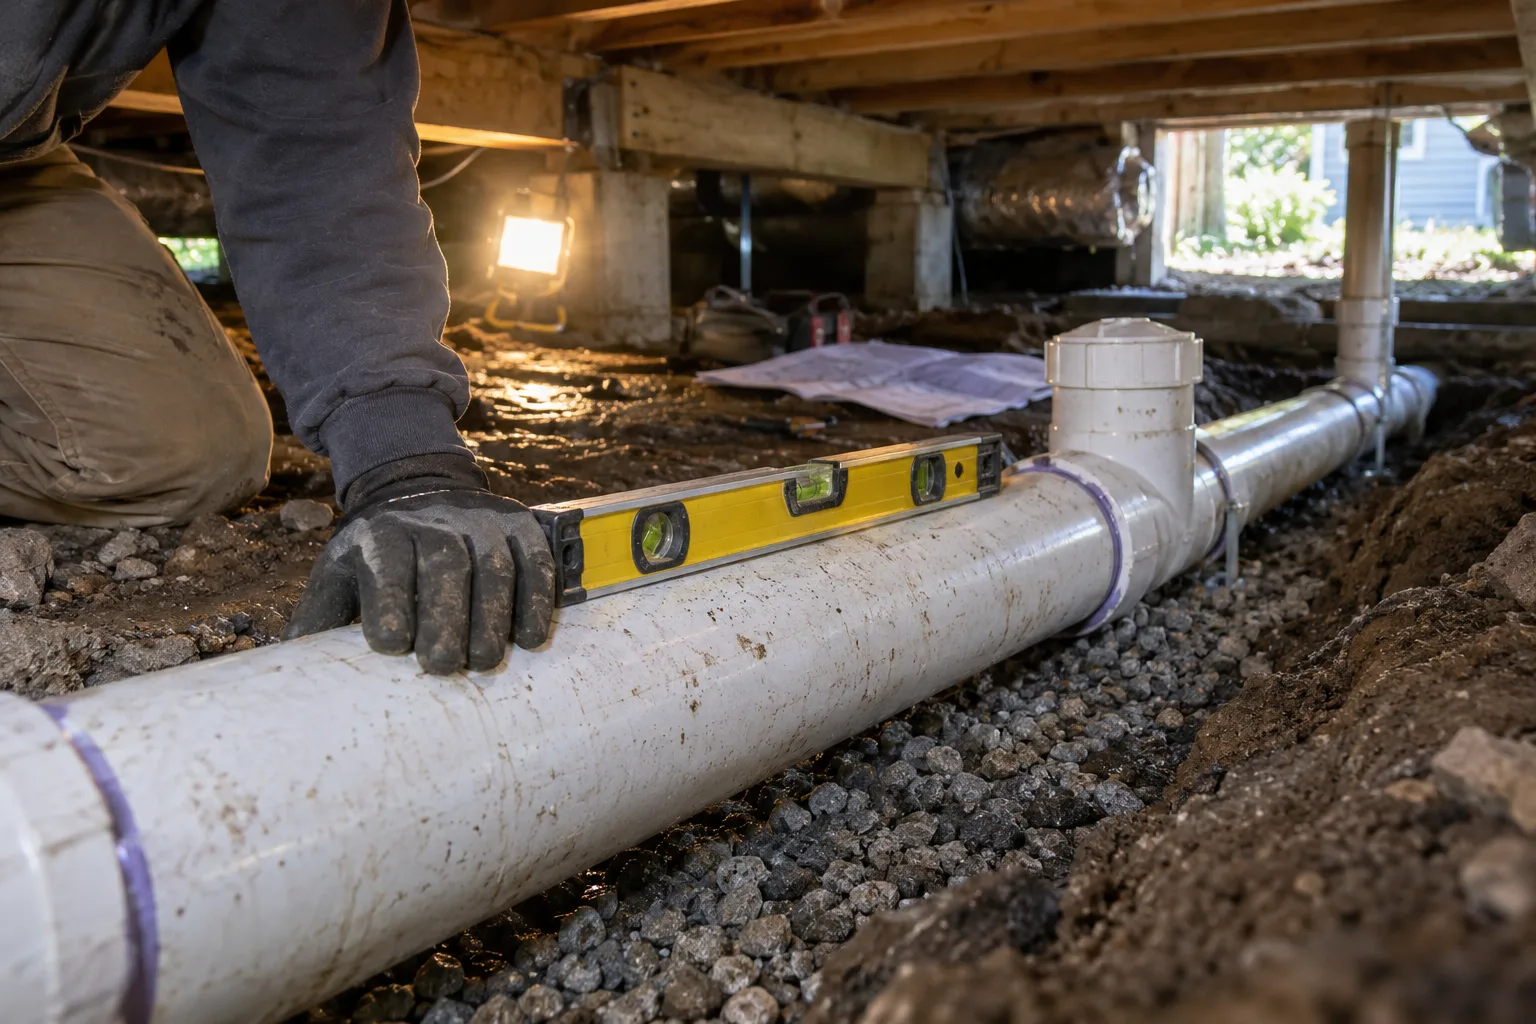
Slope adds depth. Fall equals run times slope. At 1/8 in. per foot, 48 ft of drain falls 6 in. At 1/4 in. per foot, the same run falls 12 in. Which slope applies depends on pipe size and the slope table in your adopted code, so take it from the code, not from this page. Every quantity above is invented for the exercise.
How to run a plumbing takeoff
- Reconcile the fixture schedule
Count fixtures from the schedule and from the plans, settle every difference and give each one a status. Record tag, room, sheet and revision.
- Split by system and size
Supply into hot and cold, DWV by diameter, gas on its own rows. Note the size shown on the drawing.
- Measure plan lengths
Trace each route on the plan and measure horizontal runs per size and material.
- Add the vertical rows
List trap arm drops, vent rises, stack heights and supply climbs as their own rows, with heights from the sections. A 9 ft ceiling instead of 8 ft adds a foot to every vertical run on that floor.
- Count fittings per branch
Tees, wyes, elbows, cleanouts and adapters follow the route geometry, not the length. Add couplings from stock lengths.
- Round, split phases and write the boundary
Round pipe to sticks or coils per size, keep rough-in and trim apart and write who carries service, venting, framing repairs and patching.
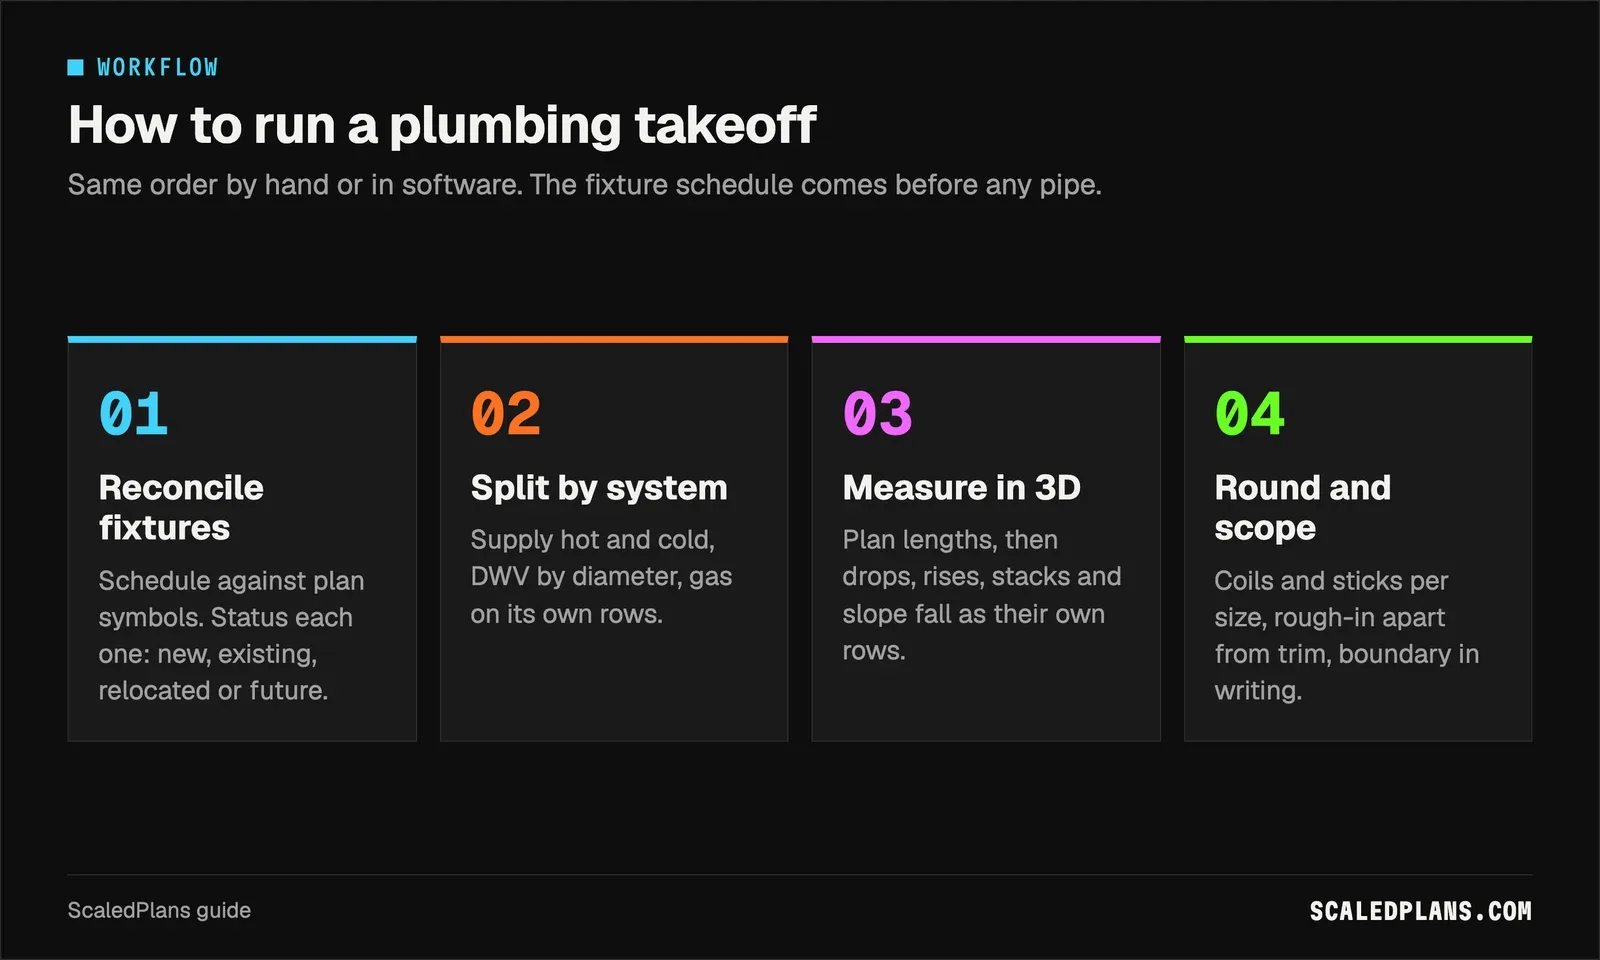
PEX in coils, copper in sticks and PVC or ABS in sticks round differently, so keep each material on its own row with the measured length beside the purchased quantity. Where trades share joist bays, compare routes with the HVAC estimating guide before you finalize them.
Plumbing estimates by job type
The method stays the same. What you check first changes with the job.
| Situation | What to check |
|---|---|
| New build, two baths | Fixture schedule against plan symbols, then hot and cold port count |
| Remodel tying into old cast iron | Allowance rows for transitions, capping and corroded sections found in demo |
| Owner supplied fixtures | Material removed from trim rows, labor to set them kept |
| Future rough-in | Pipe and cap only, no fixture and no trim |
| Plumber carries gas | Gas on separate rows with its own sizing and inspection |
| Revised sheet swaps tub for shower | Fixture row, trim assembly and drain size move together |
Remodels deserve the most care. Capping abandoned lines, tying new PVC into old cast iron and replacing a section found during demo are real scope that rarely shows on a drawing. Give each an explicit allowance row with a description, so an owner sees what you assumed and a change order has a baseline.
Rough-in, trim and the scope boundary
Separate rough-in from trim from the first row. Rough-in covers pipe, fittings, in-wall valves and the test. Trim covers fixtures, faucets, finish valves and final connections. Jobs often split them across visits, owners supply some fixtures, and change orders usually land on trim. With the two phases on separate rows, an owner supplied faucet removes a material line without removing the labor to set it.
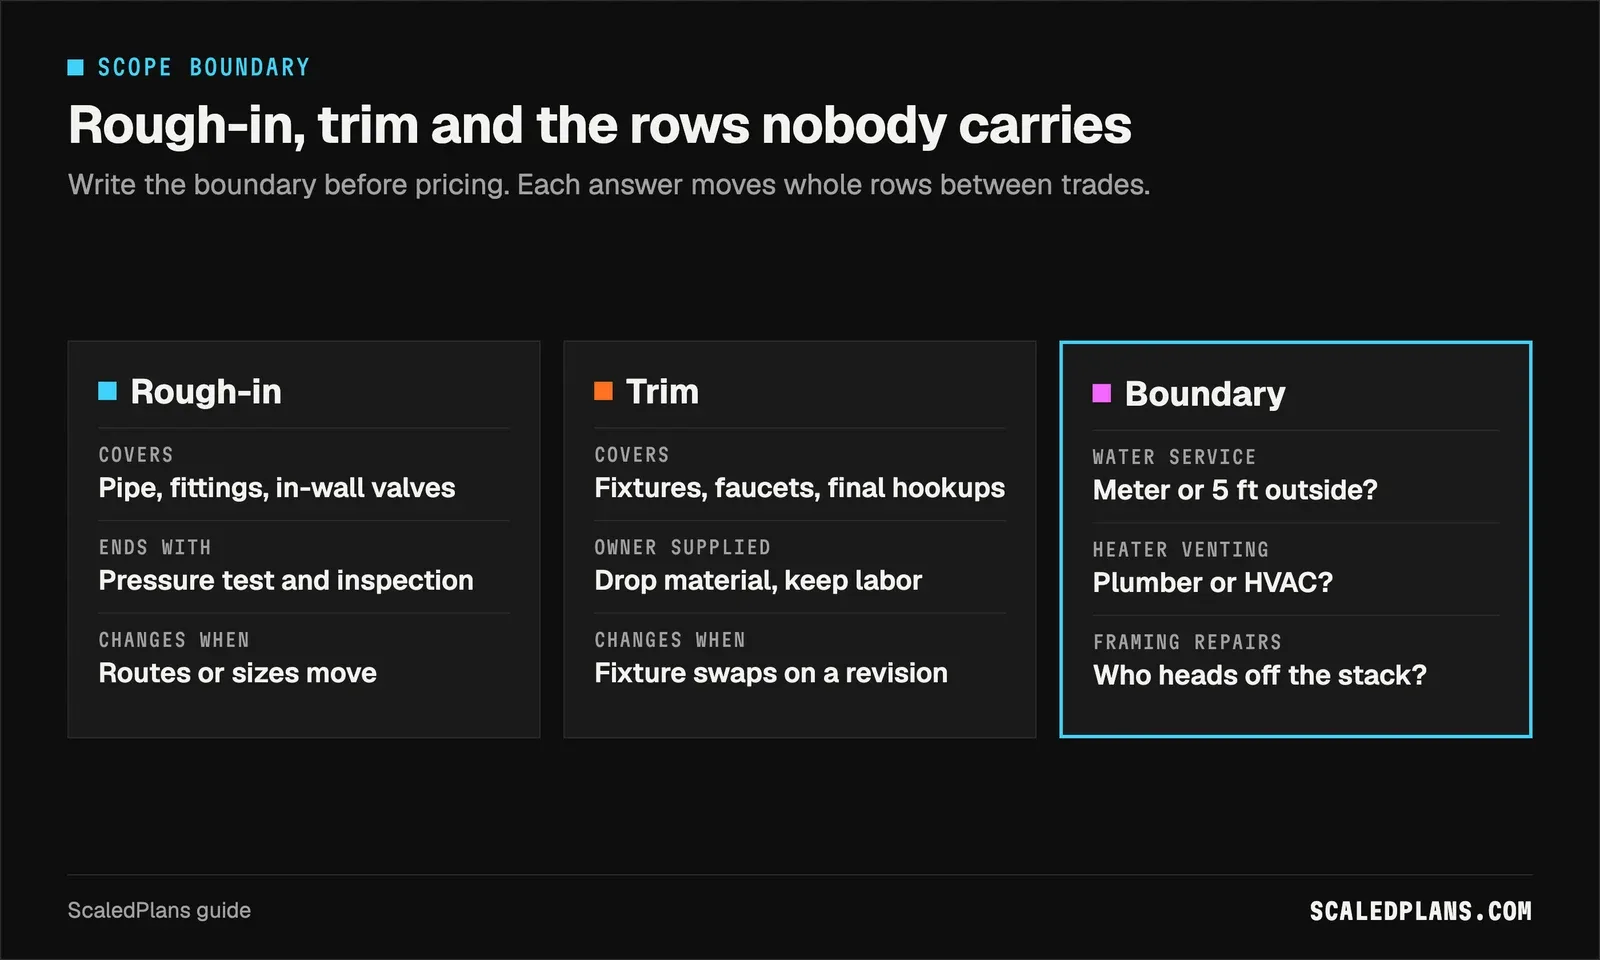
Then write the boundary. Does the plumber carry the water service from the meter, or from a point 5 ft outside the foundation? The sewer lateral, or only to the cleanout? Water heater venting, or does the HVAC contractor carry it? Drain and vent pipes pass through joists and studs, and notching and boring limits are a framing matter. If framing has to be headed off around a stack, someone carries it. The framing calculator helps count added studs and the drywall calculator sizes the patches after inspection, but the estimate must say which trade does the work. Permit and test rules vary, so confirm them with your AHJ.
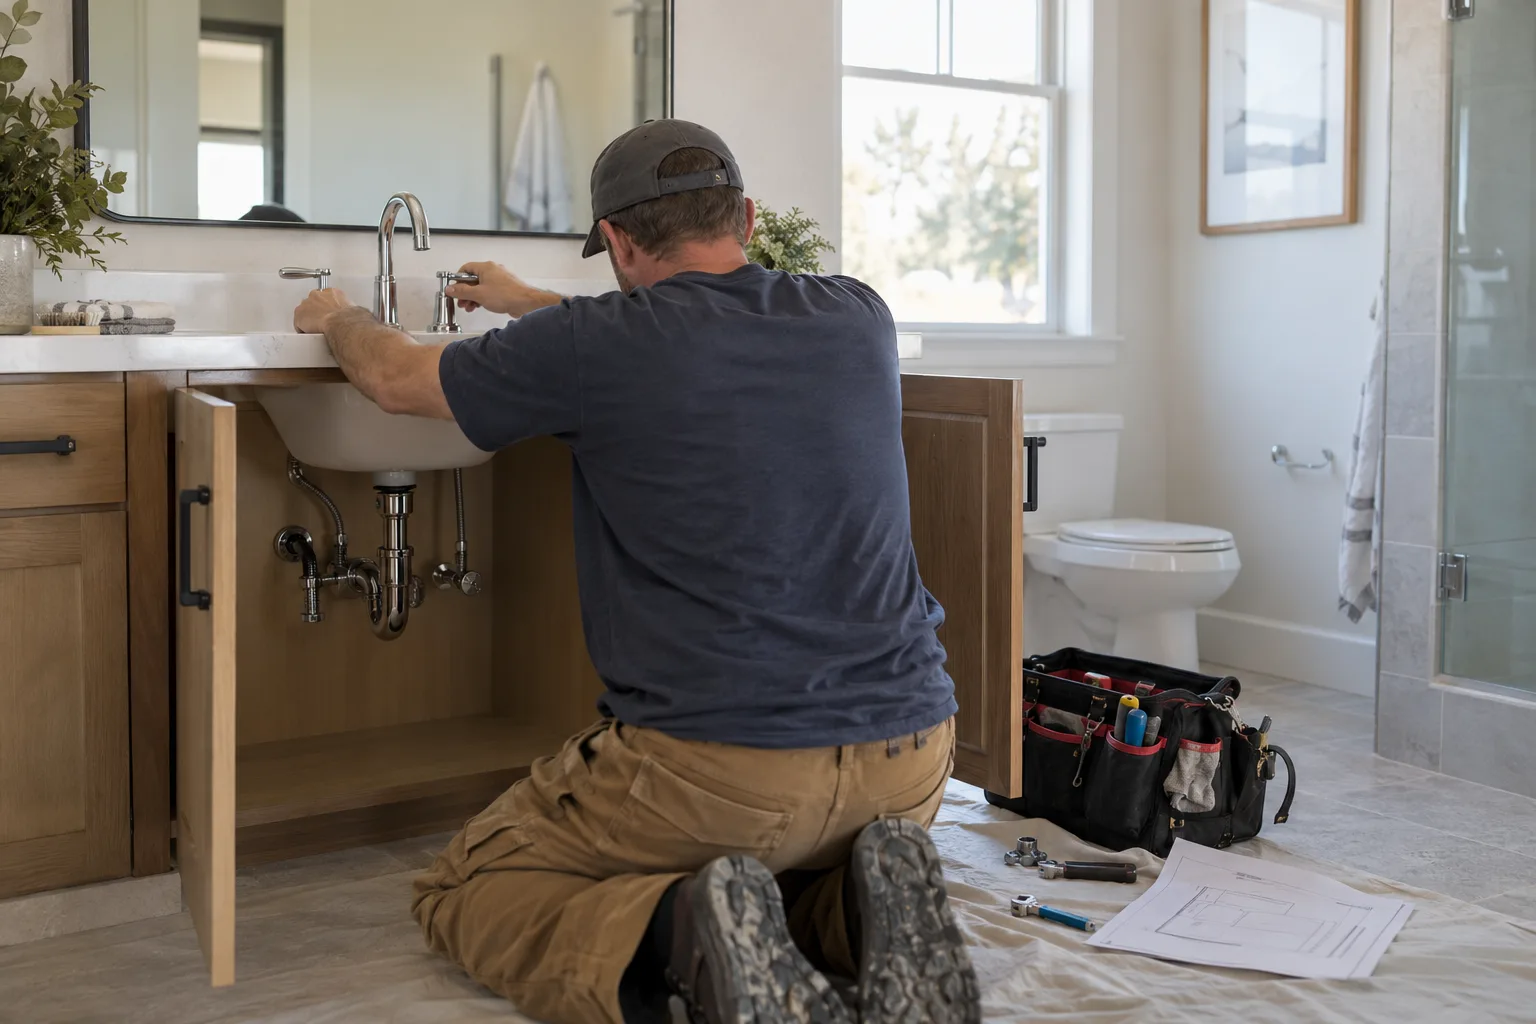
Plumbing takeoff by hand, and where it stops scaling
The free method works. Print the plan, check the scale on each sheet, and keep one row per item: tag, room, sheet, system, size, measured length, allowance, purchase unit. Count fixtures, reconcile, trace routes with a colored pencil per system, measure with a scale ruler, add vertical rows from the sections and round at the end. A PDF viewer that measures once a scale is set speeds up the tracing.
The wall shows up on the second revision. The architect moves a vanity and you re-measure every branch it touches, by hand, with no record of which runs you already counted. Scanned sheets drift off scale. Two people measuring the same bathroom produce two different lists, and neither can show where the difference came from. Use the free calculators in the tools hub for the areas and counts that support the bid while you work it by hand.
ScaledPlans measures the plan for you, and you check every quantity before you price it. Get started with one bathroom you already know.
How to test plumbing takeoff software
Take a full bath with a tub, a lavatory and a water closet from a recent job. Do the takeoff by hand first and save it. Then run the same bathroom through the software and compare row by row, not total against total.
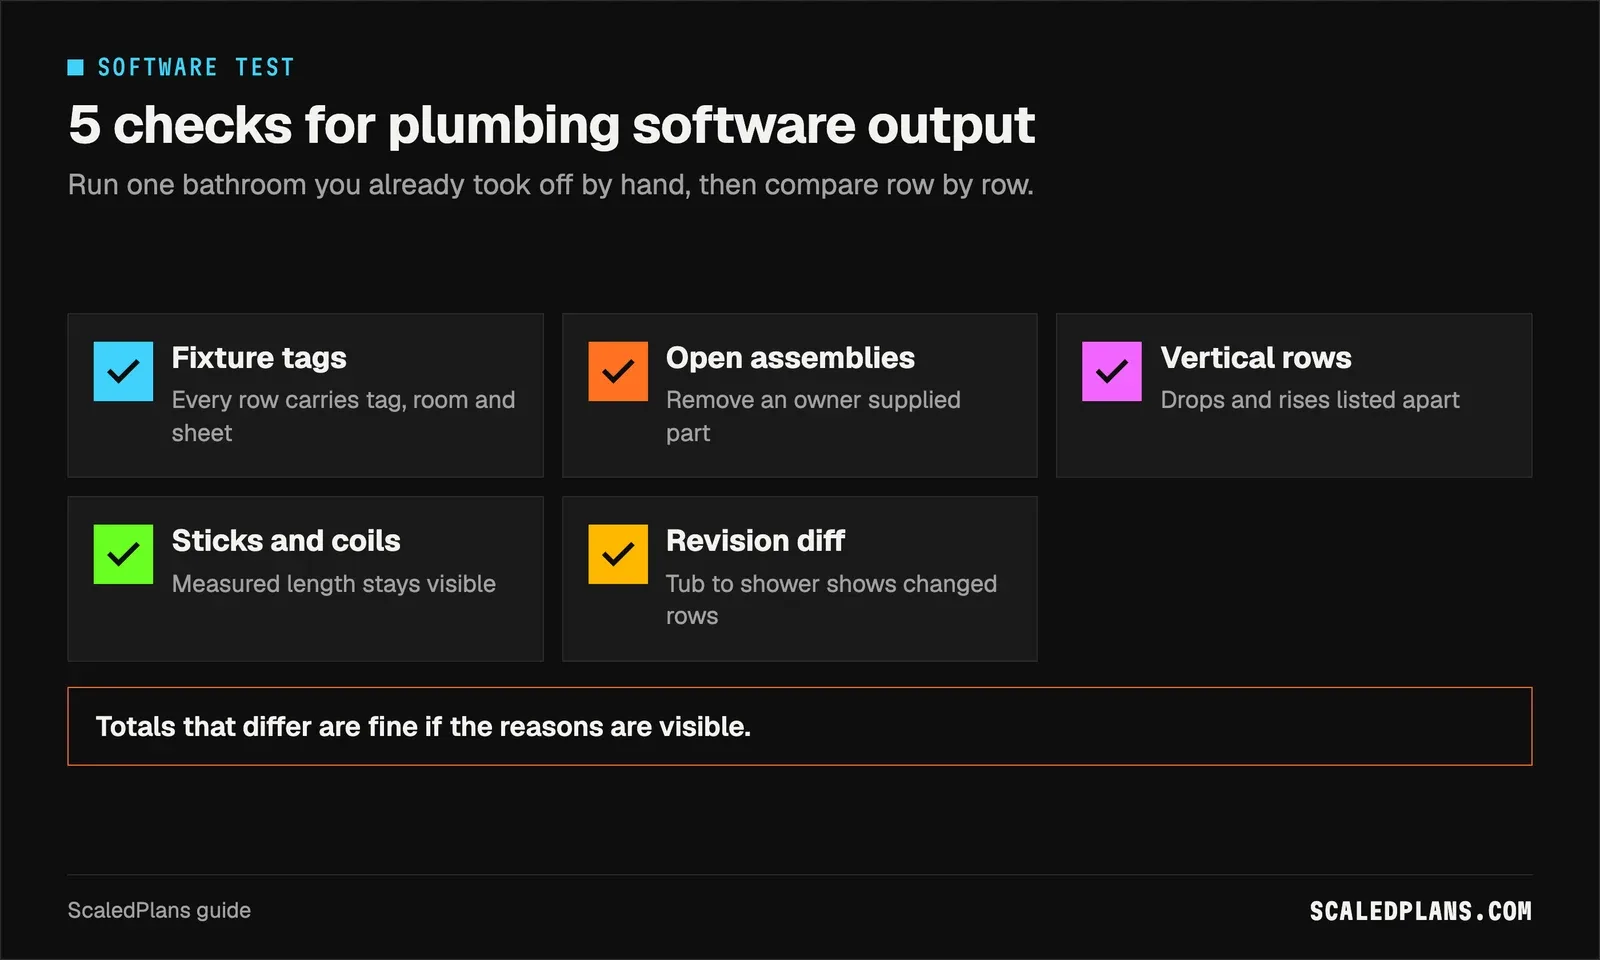
Ask five questions. Does every fixture row carry its tag and sheet? Can you open an assembly and remove a part the owner supplies? Are vertical runs listed apart from plan lengths? Does pipe round to sticks or coils per size, with the measured length still visible? When you swap the tub for a shower on a revised sheet, does the tool show which rows changed? Totals that differ are fine if the reasons are visible. Totals that match by accident are not a pass. If the tool reads symbols automatically, the AI takeoff software guide covers how to check machine counts against a schedule.
Fixture specs matter even when they do not change pipe counts. WaterSense labeled showerheads use no more than 2.0 gallons per minute, against 2.5 gpm for a standard showerhead. Note the specified flow rating beside the fixture row so a substitution at the supply house does not swap in a product the spec does not accept.
Common plumbing estimating mistakes
- Measuring pipe before reconciling fixtures. Settle schedule against plan first; every other row depends on it.
- One total for all supply pipe. Split hot and cold so ports and tees come straight from the fixture list.
- Plan lengths only. Add drops, rises, stacks and slope fall as their own rows from the section heights.
- Rough-in and trim on one line. Keep them apart so owner supplied fixtures and change orders do not take the labor with them.
- No written boundary. Name who carries service, lateral, venting, framing repairs and patching before you price.
How do you estimate a plumbing job?
Start with the fixture schedule, reconcile it with the plans and status each fixture. Count connections by temperature, measure supply and DWV by size, add vertical rows and slope, then count fittings per branch. Round to sticks or coils, split rough-in from trim and write the boundary before you add your own labor and supplier numbers.
Plumbing estimating software is worth using when every row traces back to a reconciled fixture and a measured length. The one habit that matters most: reconcile the fixture schedule against the plan before you measure pipe. Try it on one bathroom you know, by hand or with the free calculators, then hold any tool to the same rows.
Frequently asked questions
There is no single best tool across trades. A plumber needs fixture assemblies, pipe by size and material and a clean split between rough-in and trim, which general construction software may not handle well. Test any candidate on one bathroom you have already taken off by hand, compare it row by row, and keep the one whose rows you can audit and correct without losing the source sheet or the revision it came from.
Pricing comes after quantities. First count fixtures, reconcile them with the plans, measure supply and DWV by size and count fittings per branch. Then apply your own supplier figures to the material rows and your own crew history to labor, keeping rough-in and trim as separate phases. A clear scope boundary and allowance rows for unknowns in remodels protect the number when conditions change on site.
Plumbing contractors commonly mix field service and dispatch software, general takeoff tools that measure PDFs, trade estimating databases with parts libraries, and spreadsheets. Which mix fits depends on whether the work is service calls, remodels or new construction. Judge each by how well quantities keep their sheet references and how easily you can open and correct an assembly, not by how well known the name is.
There are free options for parts of the job. Many PDF viewers can measure once you set the scale, and free calculators with visible formulas cover framing, drywall and other supporting counts. Free tools work well for a baseline count on a small job. Larger bids with several revisions benefit from software that keeps a record of what was measured and shows which rows changed.
Check the scale on each sheet first. Count fixtures from the schedule and the plans, then trace supply and DWV routes and measure horizontal lengths by size. Take vertical heights from the sections, not from habit. Count fittings per branch along each route. Record sheet and revision on every row and log questions for anything the drawings leave open, such as missing vents or lines that look undersized.
Spreadsheets remain the most widely shared estimating format, often fed by a PDF takeoff tool. Trade specific estimating programs add parts databases and assemblies on top. Whatever you choose, the estimate should export rows that carry the sheet, size, unit and status, so a reviewer or a supplier can check them without reopening the drawings or asking you how a number was reached.
Put it on your next bid
Plans in. Checked quantities out.
Upload the plan you are bidding, review every quantity on the drawing and export the list. Or start with the free drywall calculator.
Share article
About the author
Founder
Oleh Onysko founded ScaledPlans and builds the product: how plans are measured, what each document includes and how every number stays checkable on the drawing.
More articles
 Takeoffs & estimating · 12 min
 Roofing Estimator: How a Roof Estimate Is Built in 6 Steps
A roofing estimator turns a roof into a scope you can price: measured squares, a pitch factor, a stated waste rate and a line for every edge, layer and penetration. Here is the method, a worked hip roof example and the mistakes that sink bids.
 Takeoffs & estimating · 12 min
 Lumber Takeoff: Count a Framing List in 5 Steps
A lumber takeoff lists every framing piece by size, length, count and wall. Count in a fixed order, convert to stock lengths and add one stated allowance. Worked example: a 20 x 12 ft addition needs 80 studs, 14 plate sticks and 17 sheathing panels.
 Takeoffs & estimating · 11 min
 Blueprint Reader: 5 Checks Before Any Takeoff
Read a plan sheet like an estimator: identify the revision, calibrate the scale twice, pick the right view and tie every quantity to its sheet. Worked example: one revised opening takes 1,920 sq ft of board down to a 65 sheet order.
 Takeoffs & estimating · 12 min
 Drywall Estimating Software: Check 46 Sheets by Hand
Drywall estimating software is only as good as the wall runs it records: length, height, faces, layers and board type. Work a fictional basement from runs to 46 sheets of 4x12, compare sheet sizes, then use the same checks on any tool's export.
 Takeoffs & estimating · 11 min
 AI Takeoff Software: A 5 Step Test on Your Own Plans
Before you trust AI takeoff software, run it on a plan you already counted. Score misses, extras and length drift per item, then convert each error into material. Worked example: 6 ft of wall drift leaves you 3 sheets of board short.
 Takeoffs & estimating · 13 min
 Roofing Estimating Software: 5 Checks Before You Trust It
Roofing estimating software turns planes, pitch, edges and penetrations into a shingle, underlayment and metal order. Here is the math behind every line, a worked 2,000 sq ft gable at 3.5 in 12, and five checks to run before you trust any tool's total.